 Posted
: 11/21/2019 | November 21st, 2019
New York City. It’s one of my favorite cities in the world and one of the most popular destinations in the US. Sprawling, busy, exciting — there’s a reason people call it the city that never sleeps!
It has something for everyone — including lots of budget-friendly activities for travelers looking to stretch their pocketbook. I lived in the city for years and still return often. Whether you’re looking for history, nightlife, food, or art, this city won’t disappoint.
To help you plan your trip, here are the best things to see and do in NYC — no matter your budget!
1. Statue of Liberty/Ellis Island

At 151 feet tall, the Statue of Liberty is spectacular to see up close. But the real highlight of this duo is Ellis Island. Here you’ll learn about the immigrant experience and get a sense of the people who helped build the city. There’s such a great sense of history there that you can’t help but be impressed.
2. Central Park
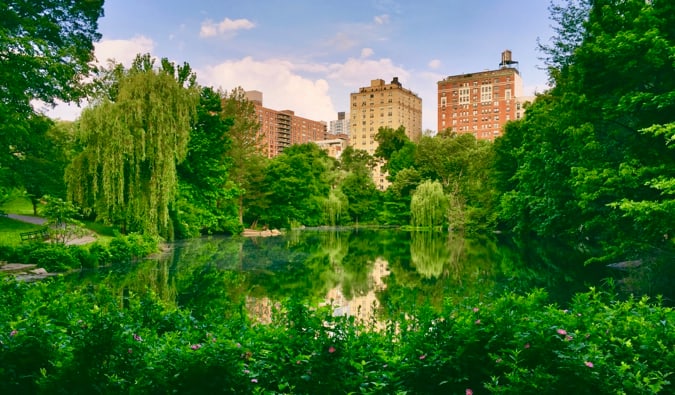
The perfect way to relax in the city and leave the crowds behind is to spend the day in Central Park. It’s free, there are lots of paths to walk (or run), bike lanes, lakes to row in, and a zoo. The park spans over 150 square blocks (840 acres) it’s easy to spend hours wandering around. During the summer months, there are often free concerts and theater productions (line up early for tickets to Shakespeare in the Park).
From the late spring to the early fall, there are free guided walks run by the parks service on Saturdays at 11am. I’m a big fan of laying out in Sheep’s Meadow on a hot, sunny day with a book, some food, and a bottle of wine.
3. World Trade Center & 9/11 Memorial and Museum

Wander the somber memorial and then take in the view from the new “Freedom Tower.” On the elevator up, you can see pictures of the historical development of the city and how it’s changed over the years. To get a deeper understanding of 9/11 and the events that unfolded, visit the museum. It’s home to some moving exhibits that illuminate the significance of the tragedy and its impact.
180 Greenwich Street, Financial District, Lower Manhattan, +1 212 266 5211, 911memorial.org. Daily memorial hours are from 7:30am–9pm. Daily museum hours are from 9am–8pm (closes one hour later on Fri–Sat). The memorial is free to visit and entry to the museum is $24. Free admission on Tuesdays after 5pm (on a first-come, first-served basis).
4. Wall Street

Take a photo with the famous Charging Bull statue (which was commissioned in 1989 and is made of bronze) and then walk to Wall Street and see where all those bankers destroyed the economy. While there isn’t much to see here (the Museum of American Finance is temporarily closed) it’s still an iconic part of the city and worth seeing with your own eyes, if only briefly.
5. Battery Park
Named Battery Park for the old batteries (cannons) that defended the city, you can stop here for music and street performers in the summer, people-watching, relaxing, and some lounging in the sun with a good book. You can also explore the ruins of the old fort that kept watch over New York City. The Park is large and can get a little hectic but there are some tremendous views of the harbor that make it worthwhile.
6. Walk the Brooklyn Bridge
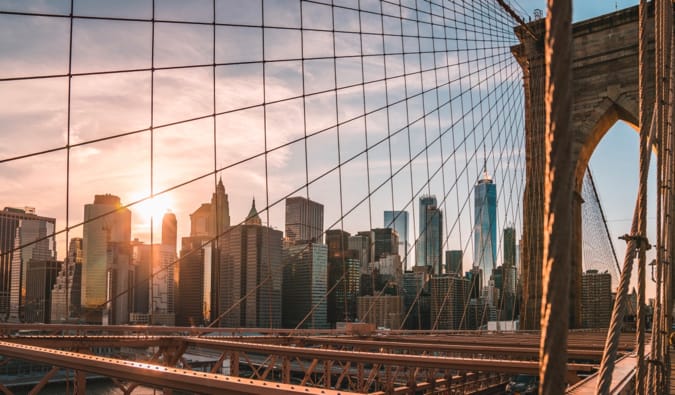
The Brooklyn Bridge offers an easy 25-minute walk into Brooklyn and the waterfront park on the other side of the bridge. Stopping to take photos and meandering along the way will make the walk about 40 minutes — which is definitely worth it! You get a lot of wonderful views of Manhattan as you make your way across. I enjoy doing this walk at night when downtown is all lit up (and there are fewer crowds).
7. Grand Central Terminal
Grand Central Terminal is the city’s historic train station. It was going to be torn down in 1975 but was saved by Jacqueline Kennedy, who raised money for its preservation. There are free historical tours on Wednesdays. I love coming to the main concourse and looking up at the “stars” in the ceiling and people-watching as everyone races to and fro.
Also, there’s an amazing eatery in the basement called the Grand Central Oyster Bar & Restaurant. And for fancy (and expensive) cocktails, visit the Campbell Apartments and step back into the 1920s (dress code enforced). The space was once the office of John W. Campbell, a member of the New York Central Railroad’s board of directors and finance tycoon from the 1920s.
89 E. 42nd Street, Midtown, grandcentralterminal.com. Opening daily from 5:30am–2am. Tours are held daily at 12:30pm for $30 per person with discounts available. Purchase at mas.org/tours or at the ticket windows.
8. Trinity Church
Trinity Church is one of the oldest churches in America. The original building burned down in 1776, but the current church is still beautiful and one of the most iconic sights in the city. It has an ornate Gothic-style structure and is famous for its colonial graveyard, where you’ll find many famous Americans (including Alexander Hamilton, one of America’s founding fathers).
74 Trinity Place, Financial District, Lower Manhattan, +1 212 602 0800, trinitywallstreet.org. Opening daily from 7am–6pm.
9. The Guggenheim Museum
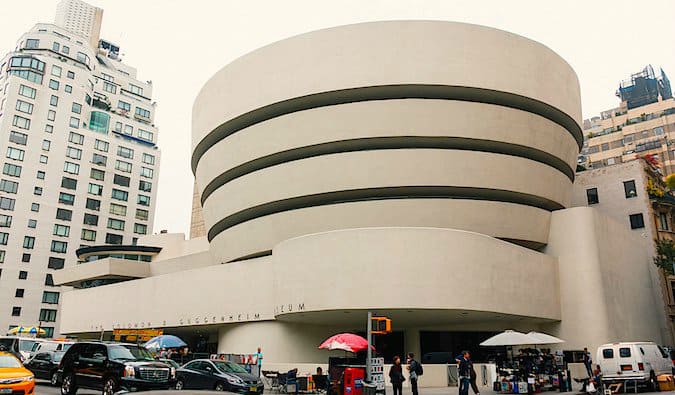
This museum is home to a renowned collection of impressionist, post-impressionist, early modern, and contemporary art. The cylindrical museum (designed by Frank Lloyd Wright) is considered one of the 20th century’s most important architectural designs. It’s one of my favorite buildings (and museums) in the city.
1071 5th Avenue, Upper East Side, +1 212 423 3500, guggenheim.org/new-york. Opening Sunday–Wednesday and Fridays from 10am–5:45pm, Saturdays from 10am–7:45 (closed Thursdays). Admission is $25 with discounts for students and seniors. On Saturday nights from 5:45-7:45pm, admission is by donation.
10. City Hall
New York’s City Hall is a great piece of historic architecture. It also has a beautiful little park nearby that’s filled with office workers during lunch (in the summer anyway). To learn about the building’s history, art, and architecture, take one of the guided tours. On a tour, you’ll be able to see the rotunda, the city council chamber, Governor’s Room, and the City Hall Portrait Collection. It’s a great place to learn about the city and how it functions.
City Hall Park. Pre-reserved tours are typically offered for groups (10–20 people) on Mondays and Tuesdays at 10:30am and for individuals on Thursdays at 10am. There are also first-come, first-served tours on Wednesdays at 12pm.
11. Rockefeller Center
Wander around Rockefeller Center to see where they film
The Today Show, shop, snack, and take the elevator to the “Top of the Rock” for another bird’s-eye view of the city (which I personally think it better than the Empire State Building, since this view includes the Empire State Building in the picture). It will be busy at sunset and on the weekends, so come during the week to beat the crowds.
30 Rockefeller Plaza, +1 212 698 2000, topoftherocknyc.com. Open daily from 8am–12am (last elevator up at 11pm). Admission is $36 to visit the observation deck once, $50 to combine that with a tour of Rockefeller Center, and $54 to visit the observation deck twice in 24 hours.
12. Times Square
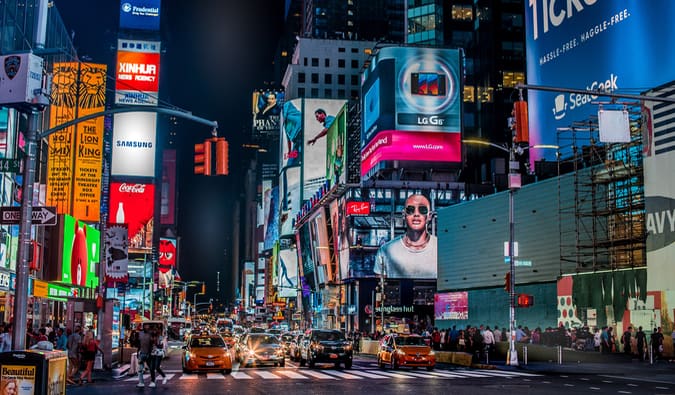
No matter when you go to Times Square, it will be packed with people (usually other tourists). There are a few pedestrian areas where you can sit and take in the city but if you aren’t shopping or eating or planning to see a show then there isn’t much to do in the area.
While no New Yorkers hang out here, it’s still a fabulous place to people-watch for a few minutes from the top of the red steps of the TKTS kiosk. You can really get a feel for how busy the city is from here.
13. The Metropolitan Museum of Art

The Met is one of the biggest museums in the world, and if you only see one museum in New York, this is the one I would recommend. It has a huge collection of art, historical artifacts, photographs, and other exhibits. There’s even a real Egyptian tomb in here! Personally, I enjoy its expansive impressionist and Greek exhibits. The museum can get a little chaotic and usually filled with people (especially on weekends) but since it is so big you can often find some quiet spots away from the crowds. You can easily spend hours here so budget a lot of time if you’re a history buff like me!
1000 5th Avenue, Central Park, Upper East Side, +1 212 535 7710, metmuseum.org. Opening Sunday–Thursday from 10am–5:30pm, Friday–Saturday from10am–9pm. Admission is $25 (includes entrance to the Cloisters and Met Breuer for three consecutive days). Free for kids 12 and under.
14. American Museum of Natural History
Made even more famous by the
Night at the Museum movies, this is another museum that requires a lot of time. The exhibits on nature, human history, and marine life are comprehensive and educational so I wouldn’t try to rush your visit. Also, don’t skip the section on space at the Hayden Planetarium, which is run by science guru Neil Degrasse Tyson. They have really detailed exhibitions on the origin of the universe!
Central Park W. at 79th Street, Upper West Side, +1 212 769 5100, amnh.org. Opening daily from 10am–5:45pm. Suggested donation of $23 ($13 for children ages 2–12). Note: Even though this museum only technically asks for a suggested donation, be prepared to pay to go into any special exhibitions and/or movies.
15. The Frick Collection

This collection features paintings by famous European artists as well as 18th-century French furniture and intricate rugs from Asia. To be honest, you have to really love Dutch artists to want to spend time here (which I do). Fortunately, they also host a lot of wonderful temporary exhibits so there is often a lot of other art to see in addition to their main collection.
1 East 70th Street, +1 212-288-0700, frick.org. Opening from Tuesday-Saturday from 10am-6pm and Sundays from 11am-5pm (closed on Mondays). Admission is $22 USD, with discounts available to students and seniors. Visit Wednesdays between 2pm-6pm and the entrance fee is “pay what you wish.”
16. The Museum of the City of New York
This museum will tell you everything you ever wanted to know about New York City. Architecture, parks, streets, culture, famous sights — you name it! There are multiple rooms that illuminate the city throughout the ages via interviews, maps, interactive exhibits, profiles of historical figures, and various artifacts. It’s the best history museum in the city. Also, there’s a fun exhibit here where you can create the future NYC (a la Sim City style). It’s great for kids!
1220 Fifth Avenue at 103rd St., +1 212-534-1672, mcny.org. Opening daily from 10am-6pm. Admission is $18, with discounted rates for students and seniors.
17. Empire State Building

This is one of the most historic landmarks in all of New York City. Built in 1931, the art deco interior is beautiful and the view from the top is breathtaking. You can get a real feel for how densely populated New York is as you stare out at the city. Get here early or during lunchtime to avoid the lines and tour groups. And don’t forget to bring your camera!
350 5th Avenue, Midtown, +1 212 736 3100, esbnyc.com. Price: $36 to visit the observation deck once, $50 to combine that with a tour of Rockefeller Center, $54 to visit the observation deck twice in 24 hours. Discounts available for children and seniors.
18. Broadway Show
You can’t go to New York City, the theater capital of the world, without seeing a show. Current highlights and my favorites include:
- The Lion King
- The Phantom of the Opera
- Wicked
- Dear Evan Hansen
- Aladdin
- Chicago
- School of Rock
- Come From Away
- Hamilton
- The Book of Mormon
You can find discounted theater tickets at the TKTS offices around the city (Times Square, South Street Seaport, and downtown Brooklyn) for shows that day. They also have an app where you can see what they offer too! Expect to spend at least $100.
19. The Cloisters
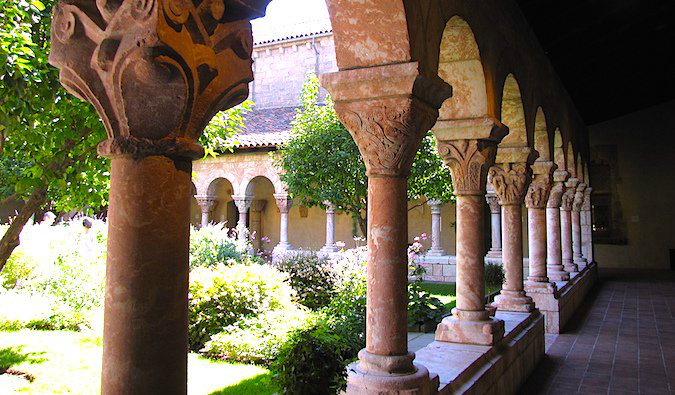
Few people make it up to the Cloisters (it’s all the way up near 204th Street), which is a branch of the Met devoted to medieval Europe. Even when I lived here, it took me years to finally see it — and I kicked myself for waiting so long! Built with Rockefeller money, the Cloisters was made from parts of five European abbeys between 1934-1939. The building and its stunning cloistered garden are serene and beautiful and a nice break for the hustle and bustle of the city. There are free tours each day that explain the history of the museum and the paintings and exhibits.
99 Margaret Corbin Drive, Fort Tryon Park, +1 212 923 3700, metmuseum.org/visit/visit-the-cloisters. Opening daily from 10am–5:15pm (closes early in the winter). Admission is $25 (includes entrance to the Met and Met Breuer for three consecutive days) and free for kids 12 and under.
20. The High Line & Whitney Museum

The High Line is a former train track that has been converted into an urban walking park. It stretches almost 1.5 miles from 34th Street to the Meatpacking District. Lined with overlooks, gardens, public art, food stalls, and greenery, this walk is one of the best things to do in the city — especially on a nice summer day. Go for a walk, sit with a book, people-watch — the High Line is a must-see and a true favorite among locals.
21. Lower East Side Tenement Museum

This is a fascinating museum that offers visitors a chance to visit former tenement apartments on the Lower East Side. You’ll learn how immigrants from around the world lived during the late 1800s and early 1900s as they tried to make it in America. It’s an insightful museum and a good follow-up to what you see on Ellis Island. You can only visit this museum via guided tours and they need to be booked in advance. Personally, I like the “Meet the Residents” tour, where live actors portray and share the story of newly arrived immigrants.
103 Orchard Street, Lower East Side, +1 877 975 3786, tenement.org. Open from Friday–Wednesday from 10am–6:30pm and Thursdays from 10am–8:30pm. Admission is $25 with discounts for students and seniors.
22. Take a walking tour
NYC is home to dozens of walking tour companies — and many of them are free! Be sure to take one of the many, many walking tours the city has to offer to get a unique and cultural look at the city that never sleeps from a local guide. There are all sorts of focused tours on street art, history, food, and much more! I always take my friends on at least one when they visit. A few walking tour companies worth checking out are:
For more suggestions, check out
my favorite NYC walking tours.
23. Museum of Modern Art (MoMA)
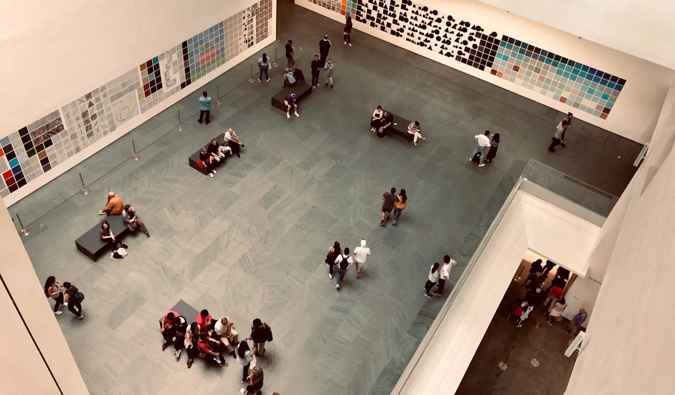
Want to see lots of beautiful (and weird) modern art? You’ve come to the right place! Personally, I hate modern art. I just don’t “get” it. But, while I dislike modern art, the MoMA does have Van Gogh’s Starry Night as well as other post-impressionist art which makes it worth visiting. If you love modern and contemporary art, this (I’m told) is one of the best in the world.
18 W. 54th Street, Midtown, +1 212 708 9400, moma.org. Open Saturday–Thursday from 10:30am–5:30pm and Fridays from 10:30am–8pm. Admission is $25 with discounts for students and seniors. The MoMA’s Abby Aldrich Rockefeller Sculpture Garden is free of charge to the public daily (9:30am–10:15am). On Fridays after 4pm, the museum is free
24. Prospect Park
Spend some time outside of Manhattan and go explore Brooklyn’s version of Central Park (the Brooklyn Museum is right next down and it’s worth a visit too). Opened in 1867, the park covers over 500 acres and is a great place to have a picnic, read a book, people watch, or lounge in the sun.
25. Bronx Zoo

Head north for a look at one of the oldest and biggest zoos in the United States. Opened in 1899, the zoo spans almost 300 acres and sees over 2 million visitors each and every year. Home to over 650 different species, it’s a great place to visit with kids. Gorillas, birds of prey, bison — there is a huge assortment of animals here and you’ll definitely learn a lot during your visit!
2300 Southern Boulevard, Bronx, +1 718 220 5100, bronxzoo.com. Open Monday–Friday from 10am–5pm and Saturday–Sunday from 10am–5:30pm (limited hours from November-April). Tickets are $22.95, but it is pay-what-you-want on Wednesdays.
26. See a Yankees/Mets/Rangers/Knicks Game
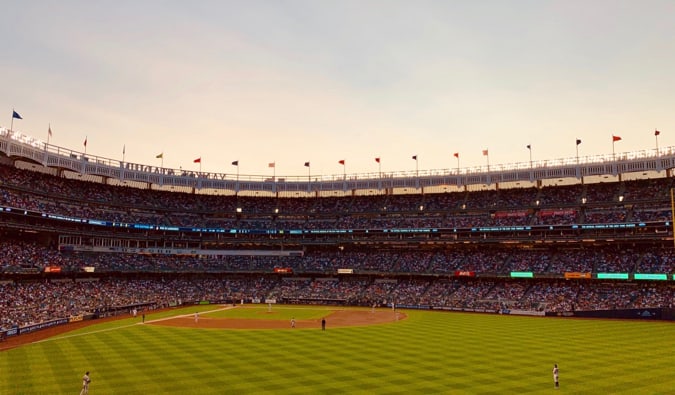
Like sports? Then you probably already know that NYC has some world-class sports teams. I’m not much of a sports fan but games are fun when you have friends to share the experience with. If you have a chance and the desire, grab some tickets to a game!
27. See a TV Show!
TV shows like Saturday Night Live, The View, Late Night with Stephen Colbert, The Daily Show, Last Week Tonight, and Late Night with Jimmy Fallon offer free tickets to their tapings (although they must be reserved well in advance). It can be very difficult to get tickets so try to get tickets for multiple shows to increase your odds. For more details, see the website of each show for details and to make reservations.
28. Batsu!
Walk through the narrow aisle of the Je Bon Sushi restaurant in the East Village, and head down the tiny stairway to find this hidden dinner theater. This four-person improv comedy competition takes place within the structure of a high-energy Japanese game show, with slapstick theatrical performances. Go with friends to enjoy some sushi, sake shots, and a night of ridiculous fun.
15 St. Mark’s Place, East Village, +1 347 985 0368, batsulive.com/new-york. Tickets from $30.50.
29. Ellen’s Stardust Diner
Since 1987, this diner is home to an incredible waitstaff of singers and dancers. Between tours and musical performances, actors and actresses wait tables at Ellen’s, where they belt out songs as they serve you slightly pricey, very American diner food (think shakes, burgers, and lasagna) in uniforms from the 1950s. It’s incredibly cheesy but good fun — especially if you’re a theatre fan!
1650 Broadway, Times Square, +1 212 956 5151. There’s usually a line so be sure to plan ahead!
***
No matter how long you’re here for — and no matter what you’re interested in —
New York City will have something for you. While it’s not the most budget-friendly city in the country, there are plenty of free activities and lots of cheap things to see and do to keep you busy and entertained.
And if you want to splurge? Well, you’ve come to the right place!
With so many things to see and do it’s no surprise that tourists love to re-visit this diverse, lovely, and eclectic city. But don’t take my word for it — put this list to the test and let me know what you think!
Get the In-Depth Budget Guide to New York City!
For more in-depth information and tips on NYC, check out my 100+ page guidebook written for budget travelers like yourself! It cuts out the fluff found in other guides and gets straight to the practical information you need to travel and save money the city that never sleeps. You’ll find suggested itineraries, budgets, ways to save money, on and off the beaten path things to see and do, non-touristy restaurants, markets, and bars, and much more!!
Click here to learn more and get started.
Book Your Trip to New York City: Logistical Tips and Tricks
Get Your Guide
Check out my detailed guide to planning a visit to NYC with suggested itineraries, places to stay, things to do, where to eat, and how to get around. Just
click here to get the guide and continue planning today!
Book Your Flight
Find a cheap flight by using
Skyscanner or
Momondo. They are my two favorite search engines because they search websites and airlines around the globe so you always know no stone is left unturned.
Book Your Accommodation
You can book your hostel with
Hostelworld. If you want to stay elsewhere, use
Booking.com as they consistently return the cheapest rates for guesthouses and cheap hotels. I use them all the time. My favorite places to stay in New York City are:
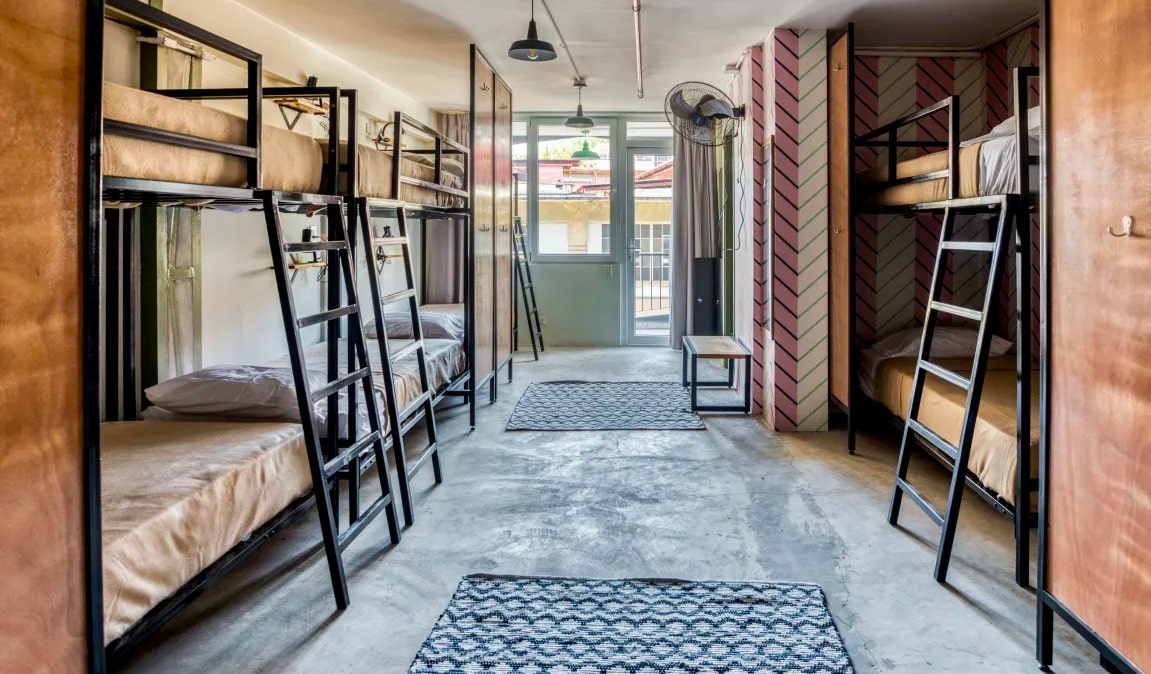
- HI NYC Hostel – One of the biggest and most popular hostels in the city with a ton of space, an outdoor patio, free Wi-Fi, events, activities, and a huge kitchen.
- Jazz on Columbus Circle – My favorite hostel in NYC, with comfy dorms and a friendly environment.
- Pod Times Square – Incredibly tiny private rooms, but with an excellent quiet location near Times Square.
Don’t Forget Travel Insurance
Travel insurance will protect you against illness, injury, theft, and cancellations. It’s comprehensive protection in case anything goes wrong. I never go on a trip without it as I’ve had to use it many times in the past. I’ve been using
World Nomads for ten years. My favorite companies that offer the best service and value are:
Looking for the best companies to save money with?
Check out my
resource page for the best companies to use when you travel! I list all the ones I use to save money when I travel – and I think will help you too!
Photo credit:
11 – Joyofmuseums,
16 – Jay
 Posted:
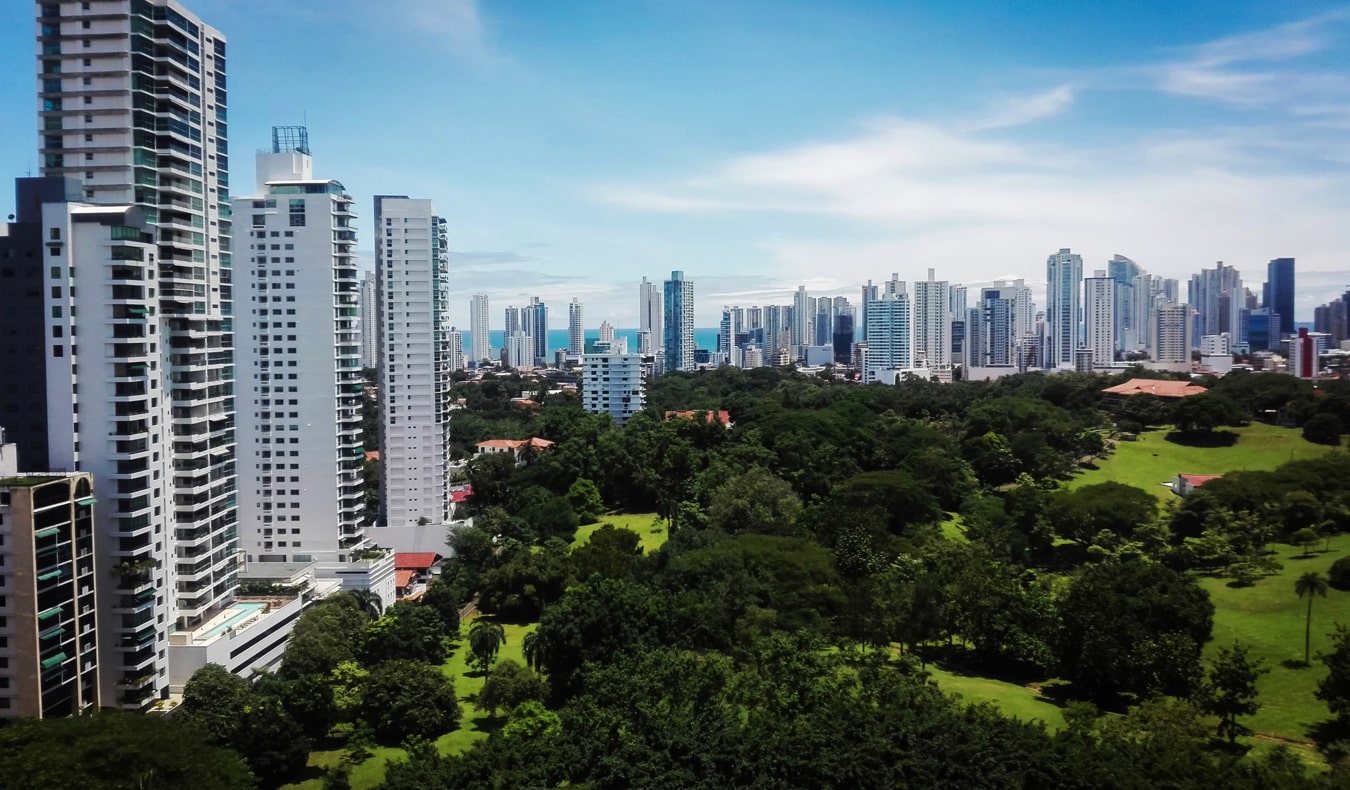
Panama City is known as the shipping and financial hub of Central America — but there’s much more to the city than that.
Panama City is a bustling, lively city with a vibrant nightlife, tons of history, and delicious food. It’s a good hub to base yourself for a few days while you plan your next steps.
Since it’s not as cheap as other cities in the region, you’ll want to save money by booking yourself a hostel while you’re here. They’re the most cost-effective (and fun) way to enjoy the city.
However, there are a lot of things to consider when selecting a hostel. The top four when picking the best hostel in Panama City are:
Posted:
Panama City is known as the shipping and financial hub of Central America — but there’s much more to the city than that.
Panama City is a bustling, lively city with a vibrant nightlife, tons of history, and delicious food. It’s a good hub to base yourself for a few days while you plan your next steps.
Since it’s not as cheap as other cities in the region, you’ll want to save money by booking yourself a hostel while you’re here. They’re the most cost-effective (and fun) way to enjoy the city.
However, there are a lot of things to consider when selecting a hostel. The top four when picking the best hostel in Panama City are:
 This boutique hostel is located in Casa Viejo, the city’s beautiful Old Town. It’s clean and quiet, making it a good choice for families or travelers looking for some down time. The hostel is an old French colonial mansion and balances historic charm with modern amenities (like AC and Wi-Fi). The beds are basic and don’t have curtains but the mattresses are thick and comfy. There are also a few common areas where you can relax and hang out or watch TV. Since it’s quiet here, I’d suggest staying here if you want to get a good sleep. There are several social hostels nearby where you can grab a drink and hang out, letting you enjoy being social before returning to your quiet hostel.
Magnolia Inn Casa Viejo at a glance:
This boutique hostel is located in Casa Viejo, the city’s beautiful Old Town. It’s clean and quiet, making it a good choice for families or travelers looking for some down time. The hostel is an old French colonial mansion and balances historic charm with modern amenities (like AC and Wi-Fi). The beds are basic and don’t have curtains but the mattresses are thick and comfy. There are also a few common areas where you can relax and hang out or watch TV. Since it’s quiet here, I’d suggest staying here if you want to get a good sleep. There are several social hostels nearby where you can grab a drink and hang out, letting you enjoy being social before returning to your quiet hostel.
Magnolia Inn Casa Viejo at a glance:
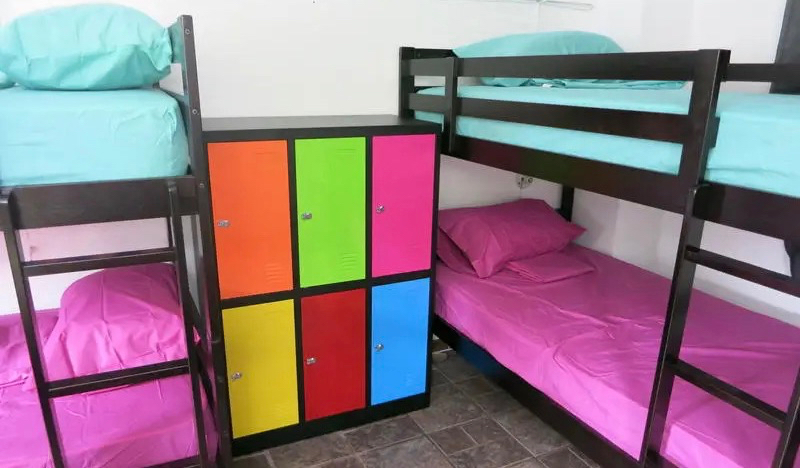
 This energetic hostel has a pool, outdoor Wi-Fi, space to barbeque, and a spacious kitchen for cooking your own meals. It’s also surrounded by bars and restaurants, making it a good choice for those who want to party. The beds are pretty basic (no curtains for privacy) but are comfortable enough to sleep on. The dorms also only have 8 beds (or less) so you’re never crammed in with other people. There are lots of common areas to relax in and they have female-only dorms too. It’s the cheapest hostel in the city.
Hostal Casa Areka at a glance:
This energetic hostel has a pool, outdoor Wi-Fi, space to barbeque, and a spacious kitchen for cooking your own meals. It’s also surrounded by bars and restaurants, making it a good choice for those who want to party. The beds are pretty basic (no curtains for privacy) but are comfortable enough to sleep on. The dorms also only have 8 beds (or less) so you’re never crammed in with other people. There are lots of common areas to relax in and they have female-only dorms too. It’s the cheapest hostel in the city.
Hostal Casa Areka at a glance:
 This is a social hostel makes it really easy to meet people here since they have a pool, a small bar, play movies outside in their outdoor cinema, and organize tons of tours (they have affordable trips to the San Blas Islands). The beds aren’t the best. Nothing to write home about but the dorms have lockers to keep your items safe and you’re really staying here for the atmosphere. Brekafast is included, there’s a spacious kitchen for cooking, and the surrounding neighborhood is quite safe too.
El Machio at a glance:
This is a social hostel makes it really easy to meet people here since they have a pool, a small bar, play movies outside in their outdoor cinema, and organize tons of tours (they have affordable trips to the San Blas Islands). The beds aren’t the best. Nothing to write home about but the dorms have lockers to keep your items safe and you’re really staying here for the atmosphere. Brekafast is included, there’s a spacious kitchen for cooking, and the surrounding neighborhood is quite safe too.
El Machio at a glance:
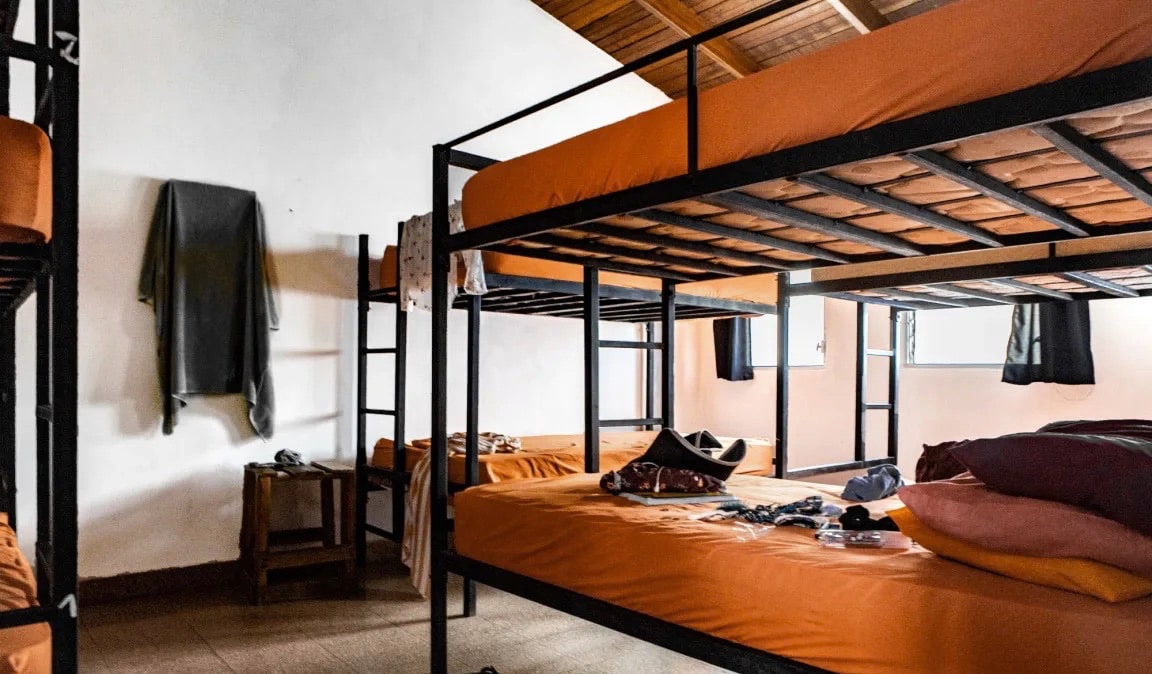
 This is my favorite hostel in the city. Housed in an old colonial mansion overlooking the ocean, it’s a cool backpacker hostel with a laid back vibe. Free breakfast is included, there’s a bar on-site for having fun, and the staff go above and beyond. They organize walking tours and other fun activities to ensure you have an amazing visit and meet cool people during your stay. They only have large dorms (10 or 12 beds) but the beds have curtains and the mattresses are comfy. It’s lively, social, and an institution on the Gringo Trail around Central America.
Luna’s Castle Hostel at a glance:
This is my favorite hostel in the city. Housed in an old colonial mansion overlooking the ocean, it’s a cool backpacker hostel with a laid back vibe. Free breakfast is included, there’s a bar on-site for having fun, and the staff go above and beyond. They organize walking tours and other fun activities to ensure you have an amazing visit and meet cool people during your stay. They only have large dorms (10 or 12 beds) but the beds have curtains and the mattresses are comfy. It’s lively, social, and an institution on the Gringo Trail around Central America.
Luna’s Castle Hostel at a glance:
 Zebulo has lots of free perks, including free breakfast, free coffee and tea, and a jaccuzzi on-site. While the dorm beds are basic (squeaky metal bunks with no curtains), they’re comfortable enough and not crowded (they cap the rooms at 9 beds). They also organize tons of tours, such as trips to Colombia and the San Blas Islands. They also host lots of weekly events (like BBQ nights). It’s a laid-back hostel that makes it easy to meet people and enjoy all the city has to offer. They also have the cheapest private rooms in the city.
Zebulo Hostel at a glance:
Zebulo has lots of free perks, including free breakfast, free coffee and tea, and a jaccuzzi on-site. While the dorm beds are basic (squeaky metal bunks with no curtains), they’re comfortable enough and not crowded (they cap the rooms at 9 beds). They also organize tons of tours, such as trips to Colombia and the San Blas Islands. They also host lots of weekly events (like BBQ nights). It’s a laid-back hostel that makes it easy to meet people and enjoy all the city has to offer. They also have the cheapest private rooms in the city.
Zebulo Hostel at a glance:
 Located in the picturesque Old Town (in yet another historic colonial building), Selina is new hostel. It’s a chic, upscale hostel that’s popular with solo travelers and digital nomads. They’ve got a spacious outdoor patio for hanging out and there are lots of bars nearby. The beds are comfy and the showers have hot water (which is a nice perk since many hostels in the city don’t have hot water). There’s AC to keep you cool, a co-working space, a pool table, and lots of common areas for chilling out.
Selina Casco Viejo at a glance:
Located in the picturesque Old Town (in yet another historic colonial building), Selina is new hostel. It’s a chic, upscale hostel that’s popular with solo travelers and digital nomads. They’ve got a spacious outdoor patio for hanging out and there are lots of bars nearby. The beds are comfy and the showers have hot water (which is a nice perk since many hostels in the city don’t have hot water). There’s AC to keep you cool, a co-working space, a pool table, and lots of common areas for chilling out.
Selina Casco Viejo at a glance:
 Posted: 7/2/2020 | July 2nd, 2020
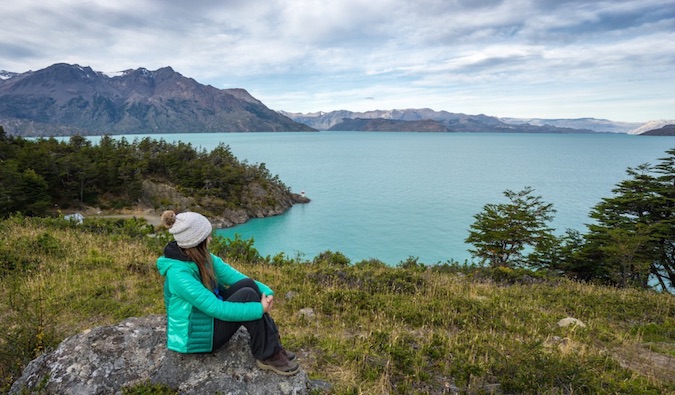
California. It’s the third-largest state in the country and home to over 40 million people and a range of environments and landscapes: dense forests in the north, rugged mountains in the east, majestic deserts in the south, world-class beaches on the coast, and the fabulous wine regions on the coast and central valley.
And it’s perfect for road trips.
Posted: 7/2/2020 | July 2nd, 2020
California. It’s the third-largest state in the country and home to over 40 million people and a range of environments and landscapes: dense forests in the north, rugged mountains in the east, majestic deserts in the south, world-class beaches on the coast, and the fabulous wine regions on the coast and central valley.
And it’s perfect for road trips.

 On the coast just over two hours south of San Francisco is a 90-mile expanse of stunning views and massive redwoods known as Big Sur. There are plenty of beautiful beaches, hiking trails, viewpoints, and campgrounds in case you want to stay overnight (which I recommend). It’s one of the most beautiful stretches of craggy, unspoiled coastline in the state, so take your time exploring as you head south.
Where to Stay
I suggest staying at least one night around Big Sur (or just south of the region) to split up the drive to LA. If you don’t have camping gear,
On the coast just over two hours south of San Francisco is a 90-mile expanse of stunning views and massive redwoods known as Big Sur. There are plenty of beautiful beaches, hiking trails, viewpoints, and campgrounds in case you want to stay overnight (which I recommend). It’s one of the most beautiful stretches of craggy, unspoiled coastline in the state, so take your time exploring as you head south.
Where to Stay
I suggest staying at least one night around Big Sur (or just south of the region) to split up the drive to LA. If you don’t have camping gear, 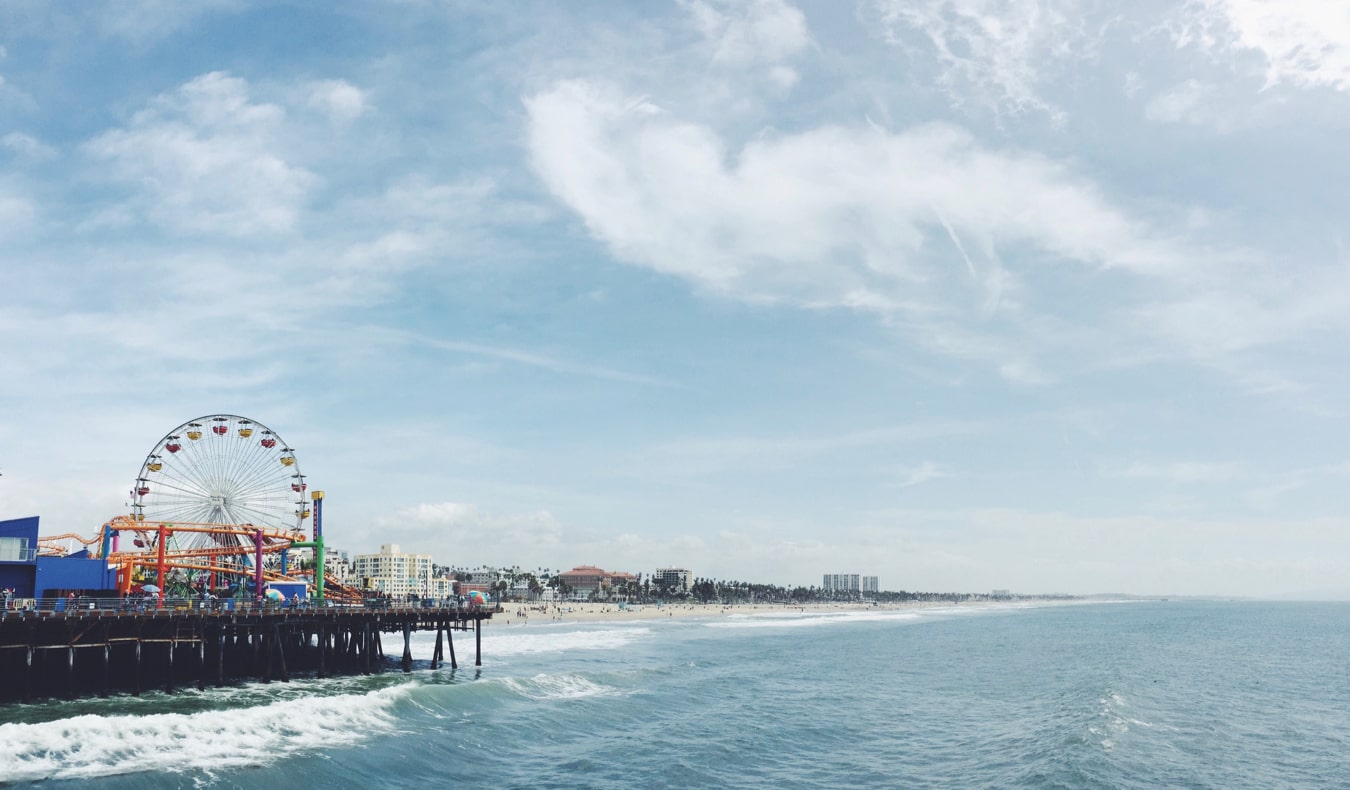 Though I hated it when I first visited,
 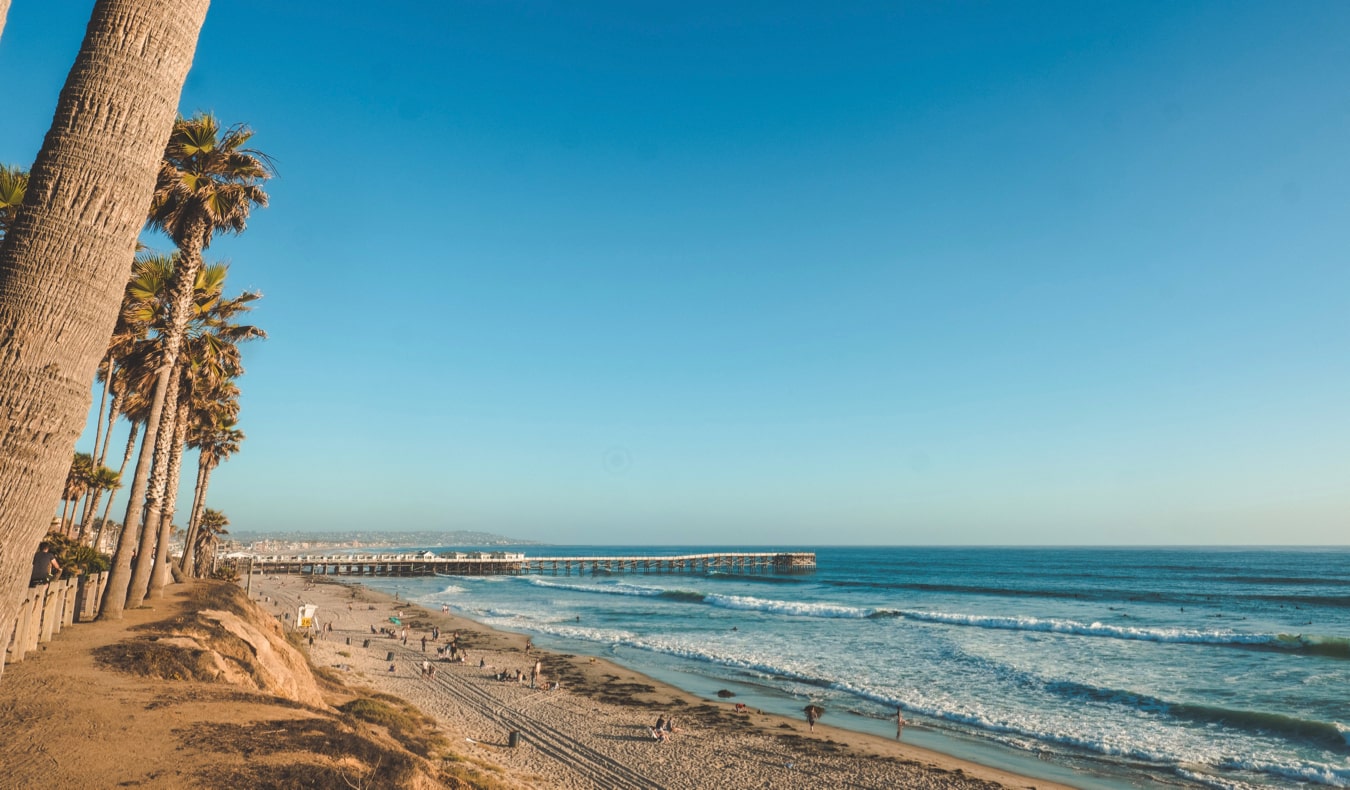 San Diego, just two hours down the coast, has just as much to offer. It’s easier to navigate (it’s smaller), the weather is always perfect, the beaches are better, and it’s cheaper too. After LA, it’s my favorite city in the state. Spend a day or two soaking up the city.
Here are some suggestions for things to see and do during your visit:
San Diego, just two hours down the coast, has just as much to offer. It’s easier to navigate (it’s smaller), the weather is always perfect, the beaches are better, and it’s cheaper too. After LA, it’s my favorite city in the state. Spend a day or two soaking up the city.
Here are some suggestions for things to see and do during your visit:
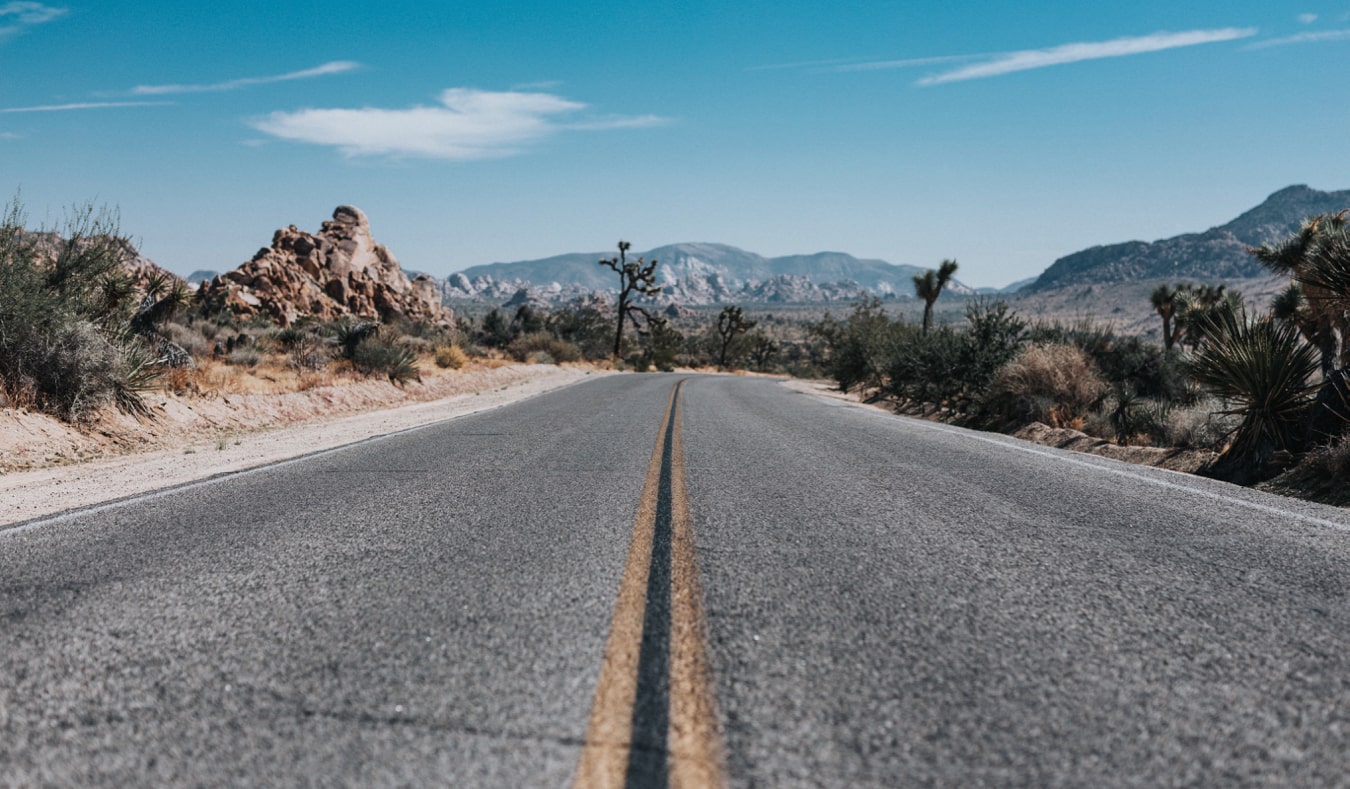
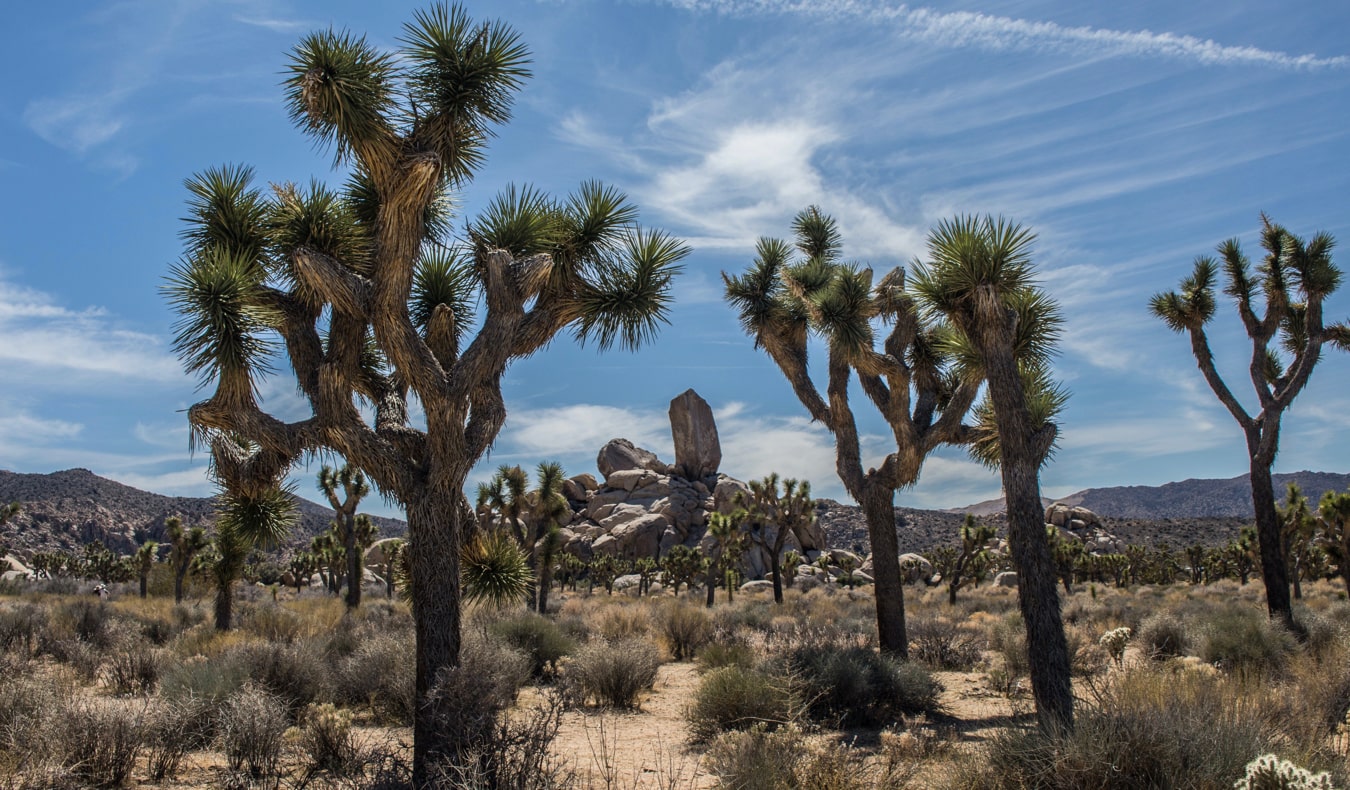 Located just under three hours from San Diego and sandwiched between the Mojave and Colorado Deserts, this is where you’ll find the iconic Joshua trees (Yucca brevifolia), twisted multibranched trees. Towering boulders dot the arid landscape and swaths of cacti poke up from the hard dirt. It’s an otherworldly place perfect for hiking, camping, and escaping the busy cities along California’s coast.
The park was declared a national monument in 1936 and designated a national park in 1994. There are a lot of trails here, so consult the trail map when you visit. Some of my favorites are:
Located just under three hours from San Diego and sandwiched between the Mojave and Colorado Deserts, this is where you’ll find the iconic Joshua trees (Yucca brevifolia), twisted multibranched trees. Towering boulders dot the arid landscape and swaths of cacti poke up from the hard dirt. It’s an otherworldly place perfect for hiking, camping, and escaping the busy cities along California’s coast.
The park was declared a national monument in 1936 and designated a national park in 1994. There are a lot of trails here, so consult the trail map when you visit. Some of my favorites are:
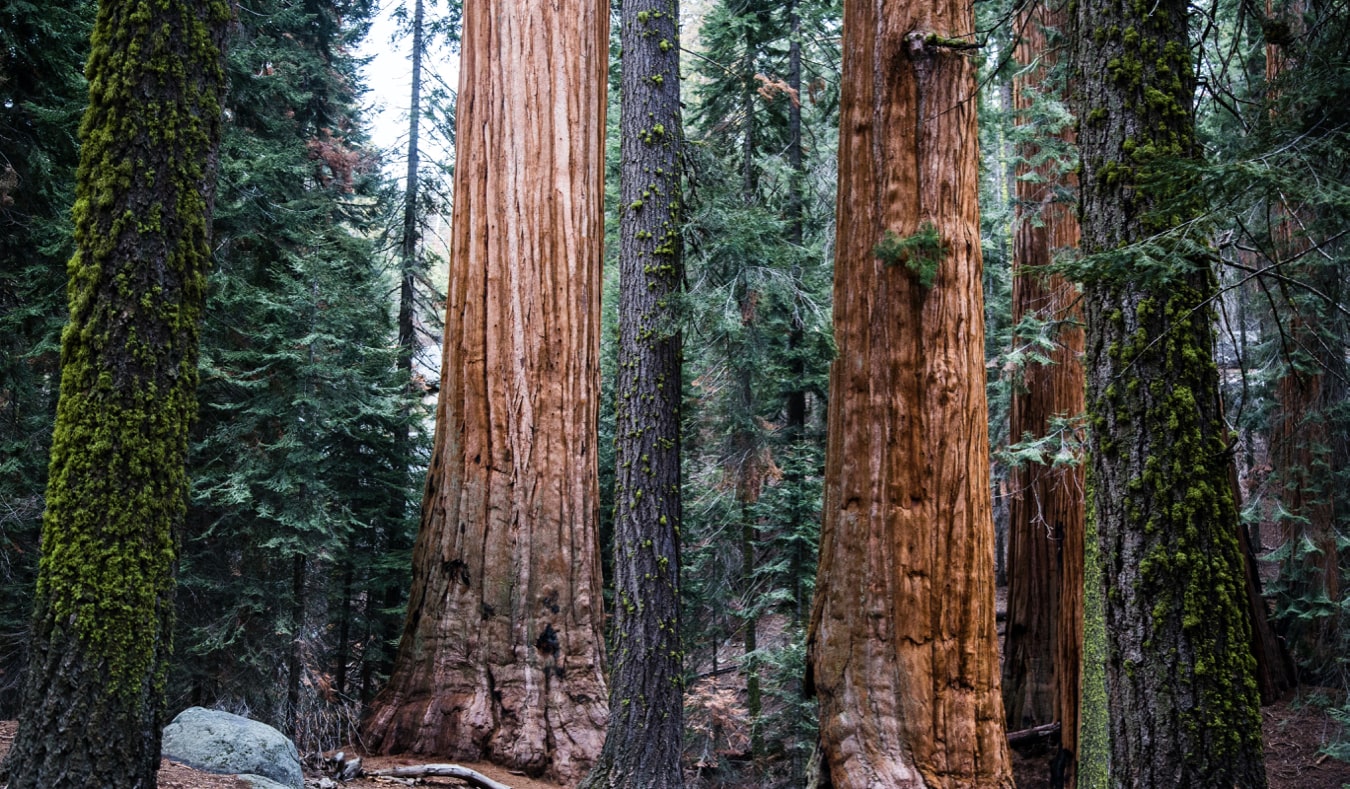 Sequoia National Park, established in 1890, is where you’ll find the largest single-stem tree in the entire world. Named “General Sherman,” this giant sequoia tree stands a whopping 275 feet tall and has a diameter of 25 feet (that’s a 103-foot circumference). It’s so big that one of its branches is bigger than almost every single tree east of the Mississippi.
Start your visit at the Giant Forest Museum to learn about the history, geography, and importance of the park and its flora and fauna. Afterward, walk the Big Trees Trail, a short loop that will get you in and amongst the trees so you can see them up close.
For a sweeping view of the forest and surrounding landscape, hike up Moro Rock, a massive 250-foot granite dome that juts out of the surrounding hills and forest. Stairs and a concrete viewpoint were built into the rock itself, so you can safely climb to the top and enjoy the magnificent vista.
And for more hiking options and beautiful scenery, visit nearby Kings Canyon National Park. Here you’ll find “General Grant” (the third largest tree in the world). For a scenic drive, cruise along the Kings Canyon Scenic Byway.
Both parks are around 4-6 hours from Joshua Tree.
Where to Stay
There are tons of places to camp here (both inside and outside of the parks). However, there are also lots of lodges and hotels if camping is not for you.
Sequoia National Park, established in 1890, is where you’ll find the largest single-stem tree in the entire world. Named “General Sherman,” this giant sequoia tree stands a whopping 275 feet tall and has a diameter of 25 feet (that’s a 103-foot circumference). It’s so big that one of its branches is bigger than almost every single tree east of the Mississippi.
Start your visit at the Giant Forest Museum to learn about the history, geography, and importance of the park and its flora and fauna. Afterward, walk the Big Trees Trail, a short loop that will get you in and amongst the trees so you can see them up close.
For a sweeping view of the forest and surrounding landscape, hike up Moro Rock, a massive 250-foot granite dome that juts out of the surrounding hills and forest. Stairs and a concrete viewpoint were built into the rock itself, so you can safely climb to the top and enjoy the magnificent vista.
And for more hiking options and beautiful scenery, visit nearby Kings Canyon National Park. Here you’ll find “General Grant” (the third largest tree in the world). For a scenic drive, cruise along the Kings Canyon Scenic Byway.
Both parks are around 4-6 hours from Joshua Tree.
Where to Stay
There are tons of places to camp here (both inside and outside of the parks). However, there are also lots of lodges and hotels if camping is not for you. 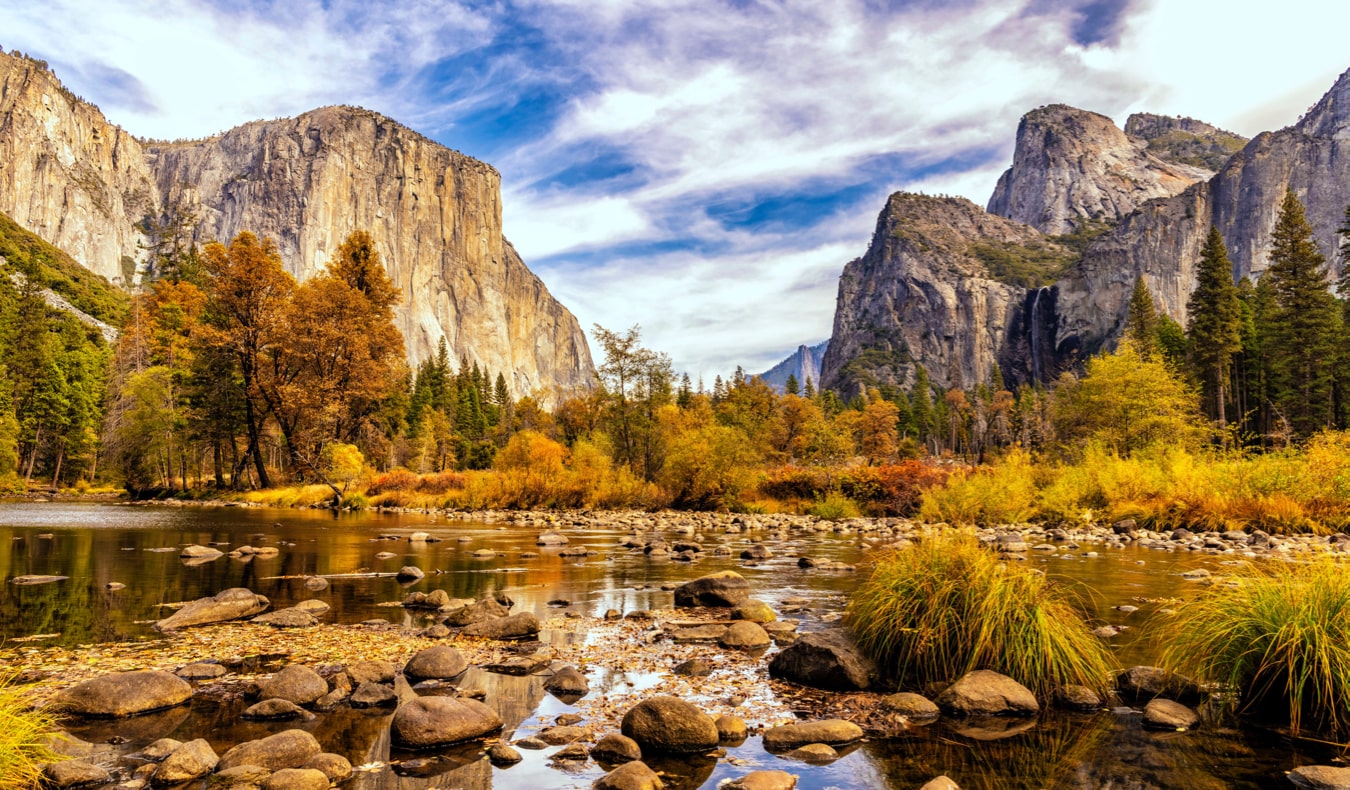 Located in the Sierra Nevada mountain range two hours from Sequoia National Park and encompassing nearly 750,000 acres, Yosemite is one of the most iconic national parks in the country. It’s where you’ll find El Capitán, the towering granite cliff you’ve likely seen on social media (it was also featured in the movie, Free Solo). It is one of the most popular parks in the US, seeing over four million visitors each year who enjoy hiking, biking, climbing, camping, rafting, canoeing, and kayaking here.
Here are a few hiking suggestions to help you get started:
Located in the Sierra Nevada mountain range two hours from Sequoia National Park and encompassing nearly 750,000 acres, Yosemite is one of the most iconic national parks in the country. It’s where you’ll find El Capitán, the towering granite cliff you’ve likely seen on social media (it was also featured in the movie, Free Solo). It is one of the most popular parks in the US, seeing over four million visitors each year who enjoy hiking, biking, climbing, camping, rafting, canoeing, and kayaking here.
Here are a few hiking suggestions to help you get started:
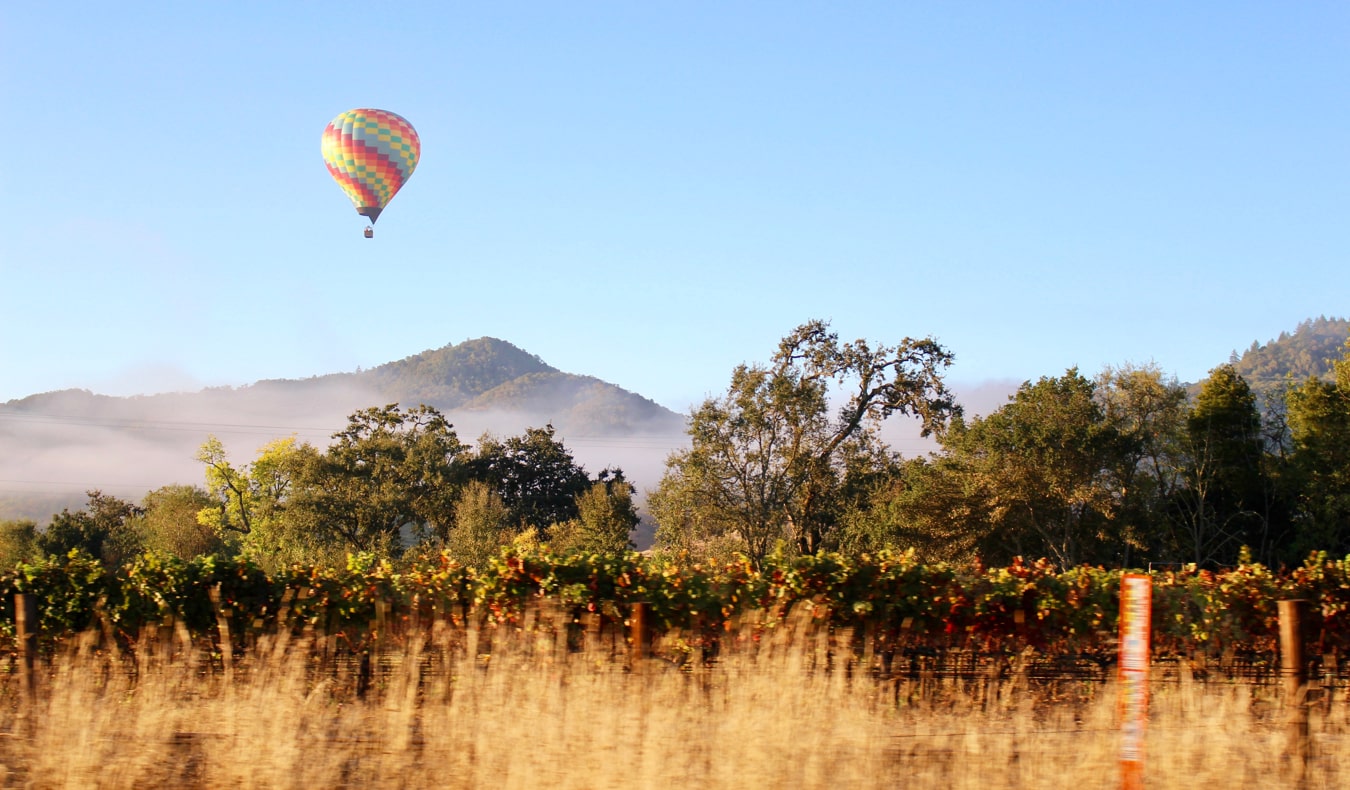 Finally, head northwest to Napa Valley, one of the world’s premier wine regions, and end your trip relaxing at a vineyard. Napa is just over three hours from Yosemite and offers a plethora of world-class wine and food to indulge in.
While it’s a particularly expensive region of the state, it is possible to
Finally, head northwest to Napa Valley, one of the world’s premier wine regions, and end your trip relaxing at a vineyard. Napa is just over three hours from Yosemite and offers a plethora of world-class wine and food to indulge in.
While it’s a particularly expensive region of the state, it is possible to  Posted: 12/5/2019 | December 5th, 2019
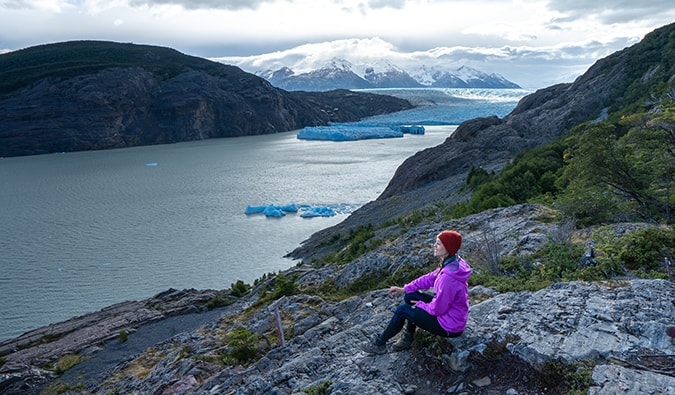
Kristin Addis from
Posted: 12/5/2019 | December 5th, 2019
Kristin Addis from  For fans of the book
  The trail I referenced in the intro is only a couple of hours long, and I had a lifetime of experience hiking with my family prior to deciding to do it solo. Start small, and go for shorter hikes in the beginning.
You can gain knowledge and confidence quickly. Less than a year after that first solo hike, I went on the
The trail I referenced in the intro is only a couple of hours long, and I had a lifetime of experience hiking with my family prior to deciding to do it solo. Start small, and go for shorter hikes in the beginning.
You can gain knowledge and confidence quickly. Less than a year after that first solo hike, I went on the  I usually hike popular trails. You’re not going to see me heading off into the backcountry alone. I’m not good enough at navigation for that. However, I’m totally confident on a well-marked trail.
For me it’s a bonus if I can meet people along the way, which I always do. It’s so much fun! Even though I boarded the bus to the start of the Annapurna Circuit on my own, I made a friend on the way, an amazing woman from
I usually hike popular trails. You’re not going to see me heading off into the backcountry alone. I’m not good enough at navigation for that. However, I’m totally confident on a well-marked trail.
For me it’s a bonus if I can meet people along the way, which I always do. It’s so much fun! Even though I boarded the bus to the start of the Annapurna Circuit on my own, I made a friend on the way, an amazing woman from 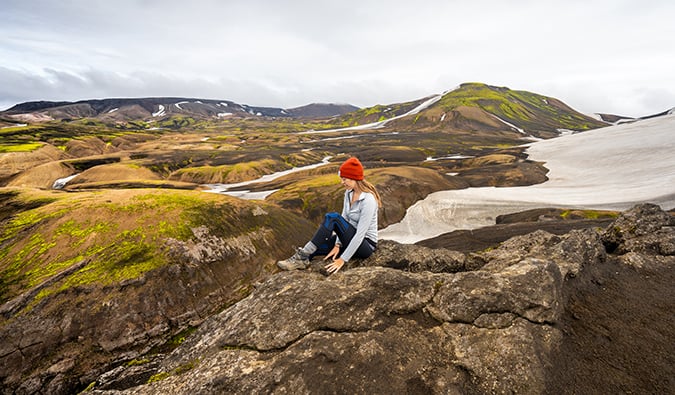 I may not know how to navigate very well with a map and compass, but I do know how to combat blisters and pick the right gear. I do have the skills necessary to cook my own food and pitch a tent on my own, and I know what to pack for a backpacking trip (
 Before I went out on the Santa Cruz hike in
  Having enough food, staying warm, staying dry, and being able to have constant access to water — whether you’re carrying it or finding it on the trail — are all imperative. Most of the time when people run into trouble, it’s because they’ve wandered from the trail, did not adequately prepare foodwise, got too cold, or ran out of water. You can make sure none of those things happen to you by being totally prepared.
 To date, the
  Now that I’ve been a
 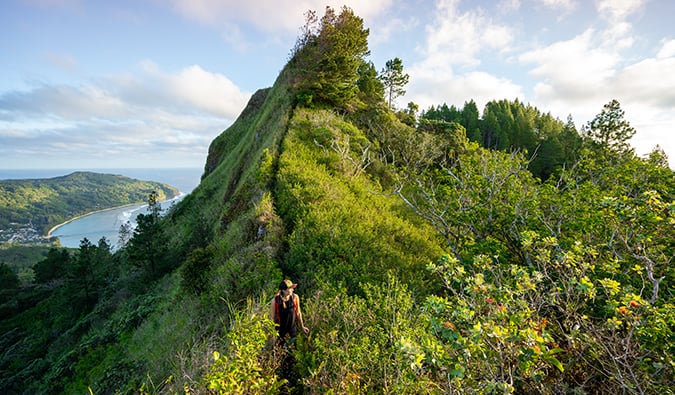 Even if you have hiked before, training for your trip is going to be a game-changer. In addition to being mentally prepared, get your body in shape for the challenge ahead.
If you can’t train by doing short hikes around where you live, put your backpack on with weight in it and get on the stair climber. I know you’re going to look weird in the gym, but the gym is for training, so who cares, right? Do endurance exercises like Pilates, and don’t wait until the last minute to get ready. The more prepared you feel, the easier it’s going to be.
Even if you have hiked before, training for your trip is going to be a game-changer. In addition to being mentally prepared, get your body in shape for the challenge ahead.
If you can’t train by doing short hikes around where you live, put your backpack on with weight in it and get on the stair climber. I know you’re going to look weird in the gym, but the gym is for training, so who cares, right? Do endurance exercises like Pilates, and don’t wait until the last minute to get ready. The more prepared you feel, the easier it’s going to be.
 The biggest problem that people experience with long-term hikes is blisters. Make sure that your
 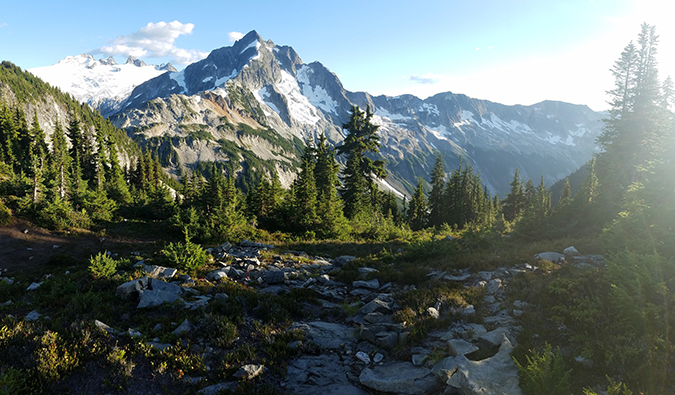 If you’re hiking solo, that means you are carrying all of the gear. If you’re backpacking, that means you alone are carrying the tent, cooking equipment, and all of the food and water. You need to shave off every gram where possible. I’m always amazed when I see people hiking with jars and hydrated foods like jam and tuna. They must be crazy!
Only bring two pairs of clothes (one to sleep in and one to hike in); bring food that you can rehydrate, assuming that you have access to water each evening; and buy lightweight gear that is designed for backpacking.
If you’re hiking solo, that means you are carrying all of the gear. If you’re backpacking, that means you alone are carrying the tent, cooking equipment, and all of the food and water. You need to shave off every gram where possible. I’m always amazed when I see people hiking with jars and hydrated foods like jam and tuna. They must be crazy!
Only bring two pairs of clothes (one to sleep in and one to hike in); bring food that you can rehydrate, assuming that you have access to water each evening; and buy lightweight gear that is designed for backpacking.
 Finally, the most important thing about hiking in the wilderness, whether with other people or on your own, is to truly leave no trace. Most people know that means not to litter, but there are other important things to understand:
 Even though I start most of my trails solo, I meet so many cool people along the way that I almost always come out of it with new friends. You don’t have to be nice to and hang out with everyone, but you may find that there are people that you want to hike with. There’s a great community of people out there, so be open to that possibility.

 Posted: 11/28/19 | November 28th, 2019
As a Cuban-American, Talek Nantes has had a lot of experience traveling around Cuba. There’s a lot more to the country than just all-inclusive resorts! In this guest post, she offers some an in-depth breakdown of how to travel around Cuba like a local.
I’ve been traveling between Cuba and the US since I was born. (Actually, even before I was born: my mom came to the States when she was pregnant with me. I like to say I was made in Havana and born in the USA.)
As a Cuban-American who wrote a book on the country and runs tours there, I’ve made it my mission to share my appreciation for Cuban culture with everyone who wants to experience it.
People frequently ask me if Cuba is expensive.
It doesn’t have to be. It can be quite an affordable place to visit.
From obvious tried-and-true advice, like eat at locations at least three blocks away from popular tourist sites, to little-known tips only the locals know, here’s how to experience Cuba on a budget.
Posted: 11/28/19 | November 28th, 2019
As a Cuban-American, Talek Nantes has had a lot of experience traveling around Cuba. There’s a lot more to the country than just all-inclusive resorts! In this guest post, she offers some an in-depth breakdown of how to travel around Cuba like a local.
I’ve been traveling between Cuba and the US since I was born. (Actually, even before I was born: my mom came to the States when she was pregnant with me. I like to say I was made in Havana and born in the USA.)
As a Cuban-American who wrote a book on the country and runs tours there, I’ve made it my mission to share my appreciation for Cuban culture with everyone who wants to experience it.
People frequently ask me if Cuba is expensive.
It doesn’t have to be. It can be quite an affordable place to visit.
From obvious tried-and-true advice, like eat at locations at least three blocks away from popular tourist sites, to little-known tips only the locals know, here’s how to experience Cuba on a budget.
 Cuban currency cannot be purchased overseas, as it is not traded internationally, so you’ll need to get it on arrival.
Cuba has two currencies: the CUC, which is what tourists and visitors use, and the CUP, also called the peso, used by everyone else. As a visitor, all your transactions will be done in CUC, which is roughly equal to one US dollar. There are about 25 CUP to 1 CUC.
In a country with 2 currencies, it is important to know the difference between a CUP and CUC. For example, you don’t want to overpay in CUC when something is priced in CUP. And when you receive change from a CUC, make sure the change is not in CUP. The best way to keep them straight is to remember that a CUC has monuments on its face and a CUP, or peso, has pictures of people.
Once in Cuba, you should exchange money at the airport “CADECA.” A CADECA is the official government exchange location. Keep in mind that you will need your passport in order to exchange currency.
Change only enough to get you to your accommodation, then change more at the CADECAs in town, as they have better rates. Avoid exchanging currency at banks and hotels, as these offer less favorable rates.
US citizens should be aware that credit cards drawn on US banks are not accepted in Cuba and
Cuban currency cannot be purchased overseas, as it is not traded internationally, so you’ll need to get it on arrival.
Cuba has two currencies: the CUC, which is what tourists and visitors use, and the CUP, also called the peso, used by everyone else. As a visitor, all your transactions will be done in CUC, which is roughly equal to one US dollar. There are about 25 CUP to 1 CUC.
In a country with 2 currencies, it is important to know the difference between a CUP and CUC. For example, you don’t want to overpay in CUC when something is priced in CUP. And when you receive change from a CUC, make sure the change is not in CUP. The best way to keep them straight is to remember that a CUC has monuments on its face and a CUP, or peso, has pictures of people.
Once in Cuba, you should exchange money at the airport “CADECA.” A CADECA is the official government exchange location. Keep in mind that you will need your passport in order to exchange currency.
Change only enough to get you to your accommodation, then change more at the CADECAs in town, as they have better rates. Avoid exchanging currency at banks and hotels, as these offer less favorable rates.
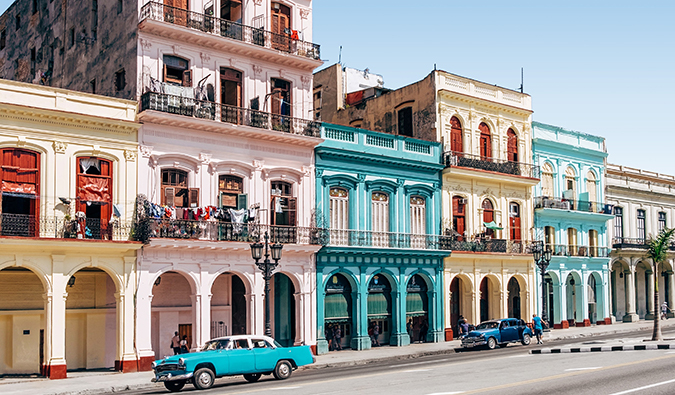
US citizens should be aware that credit cards drawn on US banks are not accepted in Cuba and  For the best value for your money, you can’t beat a casa particular.
Casas particulares, or casas for short, are the homes of local Cubans who rent rooms to visitors like a B&B. You can rent a room in a private home for an average of 30 CUC per night.
The best part of staying with a Cuban family is that you can have an authentically Cuban experience. You eat with them, hang out in their living room, play with their kids or pets. You’re treated like one of the family while you are there. That’s a lot more rewarding than staying at a sterile hotel.
It’s easy to book a casa. You can reserve on Airbnb or any number of similar online sites (though Airbnb often has the largest selection and one of the few sites Americans can widely use). You should pre-book a casa from home at least for your first night’s stay in Cuba. Once in Cuba you can book the following nights yourself either through your host or just by looking for a house with the casa sign (a blue anchor with a roof on a white background) and simply knocking on the door.
Otherwise, hostels will be your best option for saving money. Some top-rated Havana hostels include the following:
For the best value for your money, you can’t beat a casa particular.
Casas particulares, or casas for short, are the homes of local Cubans who rent rooms to visitors like a B&B. You can rent a room in a private home for an average of 30 CUC per night.
The best part of staying with a Cuban family is that you can have an authentically Cuban experience. You eat with them, hang out in their living room, play with their kids or pets. You’re treated like one of the family while you are there. That’s a lot more rewarding than staying at a sterile hotel.
It’s easy to book a casa. You can reserve on Airbnb or any number of similar online sites (though Airbnb often has the largest selection and one of the few sites Americans can widely use). You should pre-book a casa from home at least for your first night’s stay in Cuba. Once in Cuba you can book the following nights yourself either through your host or just by looking for a house with the casa sign (a blue anchor with a roof on a white background) and simply knocking on the door.
Otherwise, hostels will be your best option for saving money. Some top-rated Havana hostels include the following:
 The best places to eat in Cuba are paladares. These are privately owned (vs. government owned) restaurants. There are all types of paladares, from high-end establishments in renovated mansions to hole-in-the-wall stands.
Traditional dishes you will find at paladares include arroz con pollo (chicken and rice), ropa vieja (shredded beef), and lechón (roast pork). Typical drinks include the classic mojito, daiquiri, and Cuba Libre. Fruit juices are also readily available. The local beers, Bucanero and Cristal, are very good.
Any guidebook will point out the paladares. You can also find them in the A La Mesa app.
Typical costs (in CUCs) for meals in paladares are as follows:
High-end paladar:
The best places to eat in Cuba are paladares. These are privately owned (vs. government owned) restaurants. There are all types of paladares, from high-end establishments in renovated mansions to hole-in-the-wall stands.
Traditional dishes you will find at paladares include arroz con pollo (chicken and rice), ropa vieja (shredded beef), and lechón (roast pork). Typical drinks include the classic mojito, daiquiri, and Cuba Libre. Fruit juices are also readily available. The local beers, Bucanero and Cristal, are very good.
Any guidebook will point out the paladares. You can also find them in the A La Mesa app.
Typical costs (in CUCs) for meals in paladares are as follows:
High-end paladar:
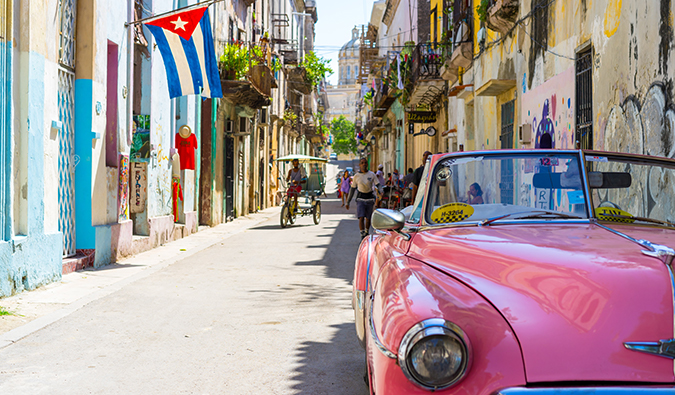
 Transportation is likely to be your biggest expense, with taxis being the most common. Rule number one for getting around in Cuba is to negotiate before getting in. Tell the driver where you want to go, or show him in writing and ask how much (“¿Cuánto?”). Whatever the driver says, counter with a couple of CUCs lower. The drivers are used to this; they generally start at a higher rate, anticipating that they will end up with a lower fee.
Yellow taxis are government-run (vs. privately owned). These are used by tourists and tend to be the most expensive.
Coco-taxis are essentially motorcycles with a cover shaped to look like a yellow coconut (hence the name), and they are everywhere. They tend to be cheaper but can only take two people at a time.
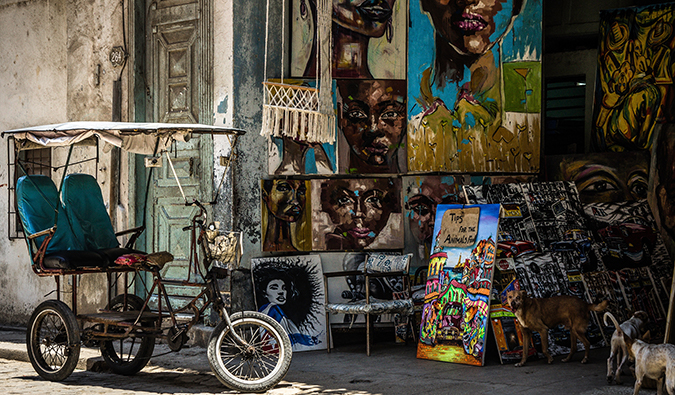
Bici-taxis are rickshaw-like bicycles that’ll take you around Old Havana.
Another option is the colectivo, or collective taxi. These are cars that travel busy thoroughfares within city limits, picking up and dropping off people as they go along. A trip from one end of a busy, central street to the other, or anywhere in between, will cost about half a CUC. The taxi is shared with up to six people.
Buses are overcrowded, unreliable, and not air-conditioned but they are very cheap. They travel major routes mostly outside Old Havana.
Typical transportation costs:
Transportation is likely to be your biggest expense, with taxis being the most common. Rule number one for getting around in Cuba is to negotiate before getting in. Tell the driver where you want to go, or show him in writing and ask how much (“¿Cuánto?”). Whatever the driver says, counter with a couple of CUCs lower. The drivers are used to this; they generally start at a higher rate, anticipating that they will end up with a lower fee.
Yellow taxis are government-run (vs. privately owned). These are used by tourists and tend to be the most expensive.
Coco-taxis are essentially motorcycles with a cover shaped to look like a yellow coconut (hence the name), and they are everywhere. They tend to be cheaper but can only take two people at a time.
Bici-taxis are rickshaw-like bicycles that’ll take you around Old Havana.
Another option is the colectivo, or collective taxi. These are cars that travel busy thoroughfares within city limits, picking up and dropping off people as they go along. A trip from one end of a busy, central street to the other, or anywhere in between, will cost about half a CUC. The taxi is shared with up to six people.
Buses are overcrowded, unreliable, and not air-conditioned but they are very cheap. They travel major routes mostly outside Old Havana.
Typical transportation costs:
 Internet access in Cuba is iffy. It is not offered everywhere, and where it is, it is unreliable.
The best way to stay connected is to purchase an internet connection card, sold in increments of 1 CUC per hour, at the local ETECSA, the Cuban government’s telecommunications office with branches all over the island. You use the login and password on the card to connect your phone or computer.
You can also purchase an internet connection card at most high-end hotels, but the cost can be as high at 7 CUC per hour, so purchasing your card at an ETECSA is a huge savings.
Once you have your card, find a location where you can connect. Most parks have connectivity, as do areas around ETECSA offices. Just look for groups of people huddled over their phones.
Higher-end hotels also offer Wi-Fi at outrageous fees.
If you don’t use up your internet time, the leftover will be saved on your card and you will be able to use it again.
A typical daily budget
For a typical day in Havana, Cuba’s most expensive city, you can expect to budget as follows:
Internet access in Cuba is iffy. It is not offered everywhere, and where it is, it is unreliable.
The best way to stay connected is to purchase an internet connection card, sold in increments of 1 CUC per hour, at the local ETECSA, the Cuban government’s telecommunications office with branches all over the island. You use the login and password on the card to connect your phone or computer.
You can also purchase an internet connection card at most high-end hotels, but the cost can be as high at 7 CUC per hour, so purchasing your card at an ETECSA is a huge savings.
Once you have your card, find a location where you can connect. Most parks have connectivity, as do areas around ETECSA offices. Just look for groups of people huddled over their phones.
Higher-end hotels also offer Wi-Fi at outrageous fees.
If you don’t use up your internet time, the leftover will be saved on your card and you will be able to use it again.
A typical daily budget
For a typical day in Havana, Cuba’s most expensive city, you can expect to budget as follows: