Author Archives: NomadicMatt

How to Take the Perfect Photo: Advanced Techniques

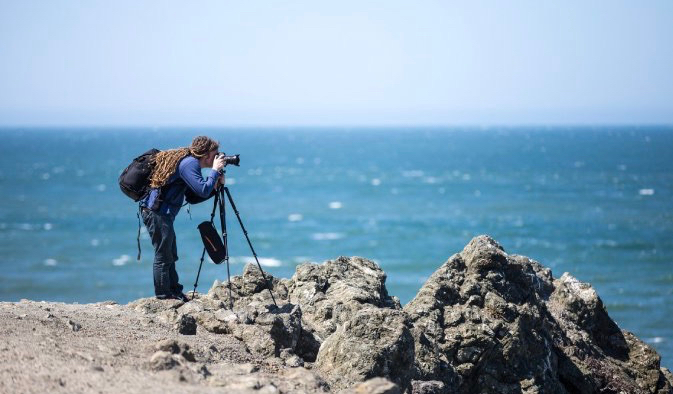
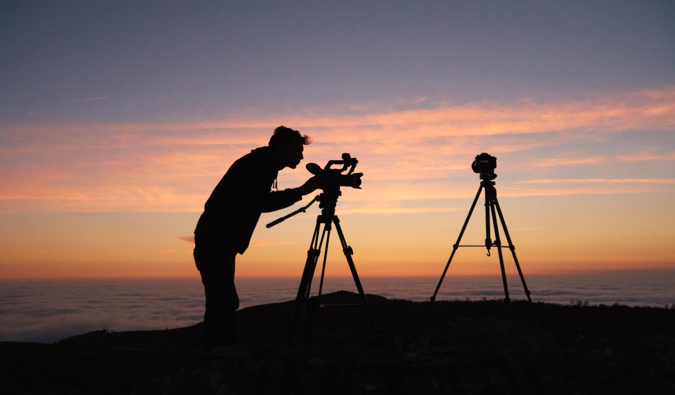
a man taking photos on a mountain
Updated: 12/09/2018 | December 9th, 2018

Today, professional photographer Laurence Norah of Finding the Universe, continues his five-part series on taking better travel photos. In this post, Laurence is taking it up a notch to give some advanced travel photography techniques such as long exposure shots, HDR, star shooting, and more!

One of the challenges we face as travelers is that so many of the places we visit have already been photographed extensively.

In today’s post, I want to share with you some advanced travel photography techniques that will help you get more creative with your travel photography. These more advanced concepts build upon the ideas in the first three posts in this series.

I’m going to cover four topics in this post on advanced travel photography techniques that will open up new creative possibilities for when you’re out and about:

  1. Long-exposure Photography
  2. Night Photography
  3. High Dynamic Range (HDR) Photography
  4. High Contrast Photography

Just click on the links above to jump direcly to that section.

Part 1: Long-Exposure Photography

Have you ever seen a photo of a waterfall where the water looks white and fluffy? Or a shot of a street at night where the cars have been replaced by streaks of light? Here’s an example of a waterfall to give you an idea of what I’m talking about:
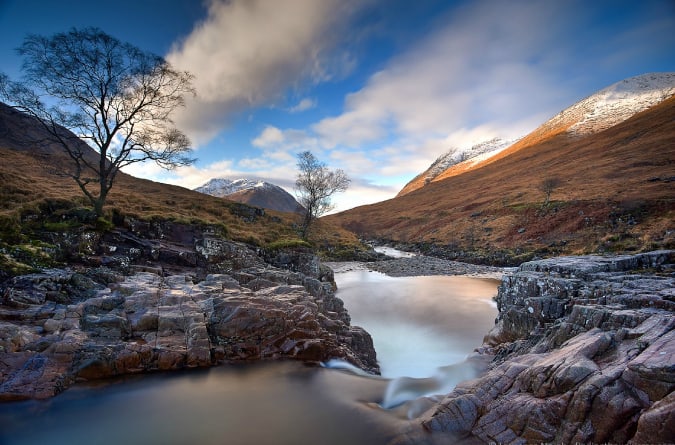
Photo of waterfall, Glen Ivet Valley in Scotland by Laurence Norah

This was shot in Glencoe, a stunning part of the Scottish highlands. As you can see, the water’s surface has a silky, flat look, and the waterfall itself looks more like cotton than water. Additionally, the clouds in the sky have a sense of motion.

Here’s another shot, of the Dubai Marina at night, where you can see the cars have been replaced by streaks of light:
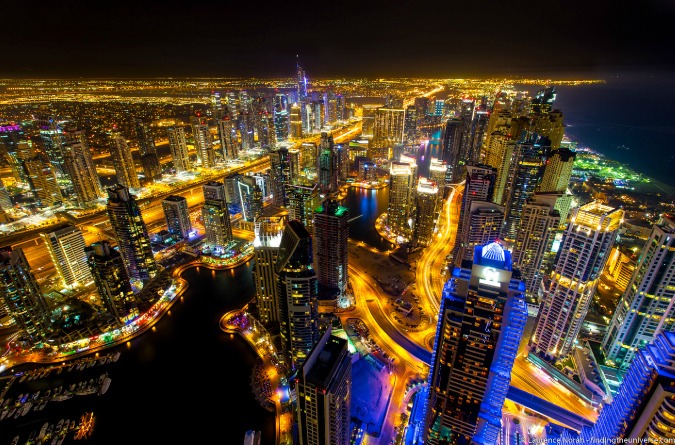
Picture of the Dubai marina night skyline

Both of these shots were achieved using the same technique, long-exposure photography.

I talked a little about using shutter speed in post two of this series, and how too low a shutter speed can result in blurry images due your hand movement. Long-exposure photography is all about taking advantage of that blurry effect, but as a result of the objects in the scene instead.

You are going to need a tripod to make this work, as otherwise, your images will be blurry everywhere rather than just where you want them to be.

The secret to long-exposure photography is to put your camera in either shutter-priority or manual mode, which will allow you to set how long the camera’s shutter is open for. This will be marked as “S,” “Tv,” or “T” mode on the mode dial if your camera has one. If you’re shooting using a smartphone, many recent models, such as the LG G4, also let you manually set the shutter speed via the camera app.
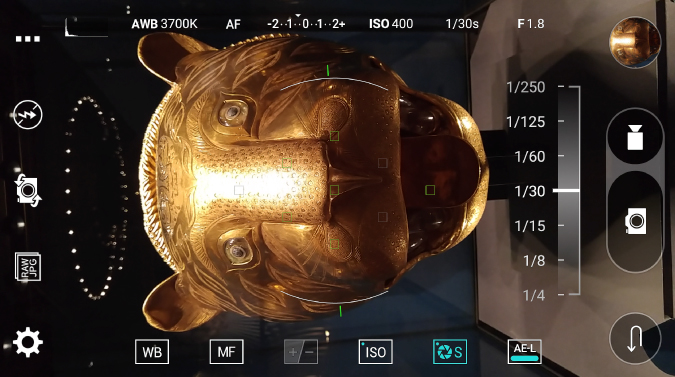
Screenshot of LG photography screen by Laurence Norah

For waterfall shots, you’re looking at any shutter speed slower than 1/15 of a second. For traffic, it will depend on the speed of the traffic, but you’ll need to shoot at speeds slower than one second. Both of the long exposure shots I’ve shared above were shot with a 30-second exposure.

If you are shooting in the daytime, you might need a neutral density filter in order to compensate for the amount of light available (see the travel photography gear post, the third in the series, for more information). If you’re shooting in manual mode, you’ll have to set the aperture to get the correct exposure. Try to avoid apertures higher than f/16 though, as they often result in lower-quality images.

Long-exposure photography will have you looking at the world and motion in new ways, and it opens up all sorts of creative possibilities. Have fun with it!

Part 2: Night Photography

When I travel, one of my favorite things is getting far away, to the middle of nowhere, and just looking up at the night sky. Away from the city lights, it’s is one of the most spectacular views available to us, and gazing up at it always helps me gain a sense of perspective.

Of course, once I’m done looking at it, I want to try and capture it as a photo. This isn’t as hard as you might think and, apart from a tripod, doesn’t need a great deal of expensive equipment to achieve. But shooting star trails does require more thinking than just pointing your camera at the sky and hitting the “expose” button.

There are two main types of star photography. First, you can do a long-exposure shot and turn the stars into streaks of light, like this:
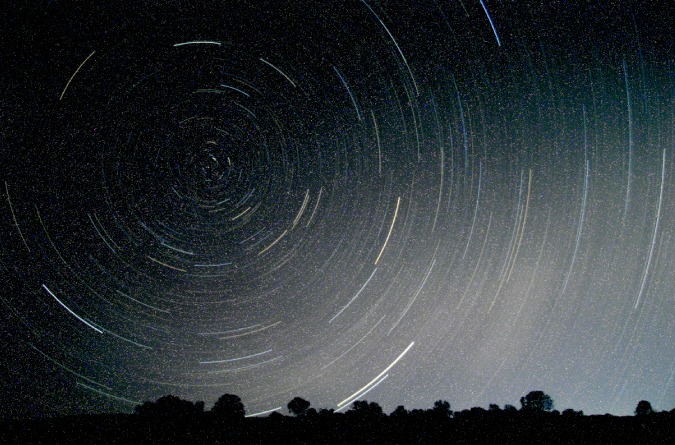
Incredible photo of stars wheeling in Western Australia outback

This was a two-hour exposure I shot while camping in the Western Australian outback. Yes, two hours! (You need a lot of patience and a decent battery for long-exposure star photography.)

You can also do multiple long exposures lasting from 30 seconds to a minute and then stack the resulting photos together using specialist software like this. This reduces the “noise” that super-long exposures are known for, as well as the risk of your battery going flat mid-shoot, but it does require more work afterward.

However, most cameras won’t let you shoot for longer than 30 seconds in manual mode. You have to switch to “BULB” mode, whereby the shutter button will stay open for as long as you hold the shutter down. Some cameras have this in manual mode rather than a dedicated BULB setting — check your camera manual to find out how your model of camera works.
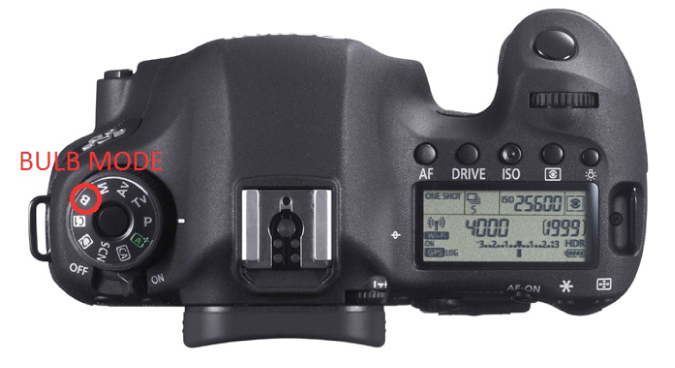
Image of camera body in bulb mode

You are unlikely to want to stand with your finger on the shutter button for two hours, but don’t worry, you have some options. The easiest is to invest in a remote release cable, which will let you “lock” the shutter button down for as long as you want. Alternatively, if you have a more modern camera with Wi-Fi built in, you might find that there is an app that lets you control the length of the exposure beyond 30 seconds.

Finally, consider the movement of the stars. The earth rotates from west to east, so if you want circular star trails, you’ll need to point your camera north or south. If you’re in the northern hemisphere, composing around the North Star (which remains stationary) is a good place to start.

The other type of star photo is where you capture the night sky without motion. This will likely still require a long exposure, but one that is not so long as to result in the stars blurring from motion. Around a 30-second exposure is the maximum before the motion of the stars from the earth’s rotation becomes apparent. Here’s a 30-second exposure of Venus setting in the Galápagos as an example:
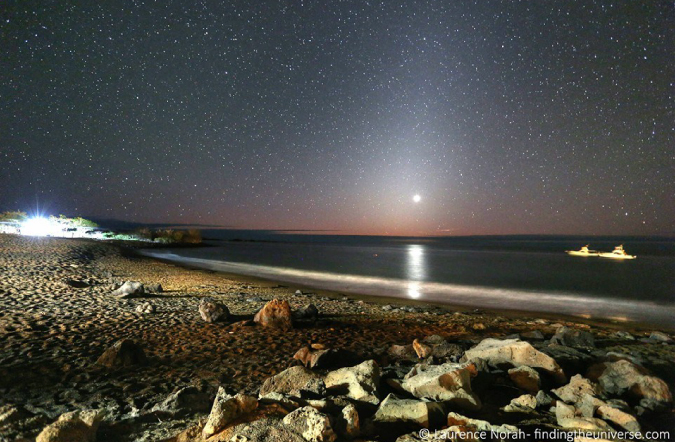
Photograph of venus setting across Floreana, in the Galapagos Islands

The setup is very similar to star trail photography, in that you will need a tripod and will have to consider your composition. However, with only a 30-second exposure, you are going to need to increase the ISO on your camera to get as much light in as possible.

Modern cameras are capable of shooting at ISOs of 3200 and 6400 without introducing too much noise into the image. In addition, you’ll want to open your aperture as wide as possible — depth of field isn’t really a consideration when shooting the infinite! Open it as wide as it’ll go, preferably in manual mode.

In some ways, these shots are easier because you’ll be able to see the results a lot more quickly. Here’s a shot of the stars over France:
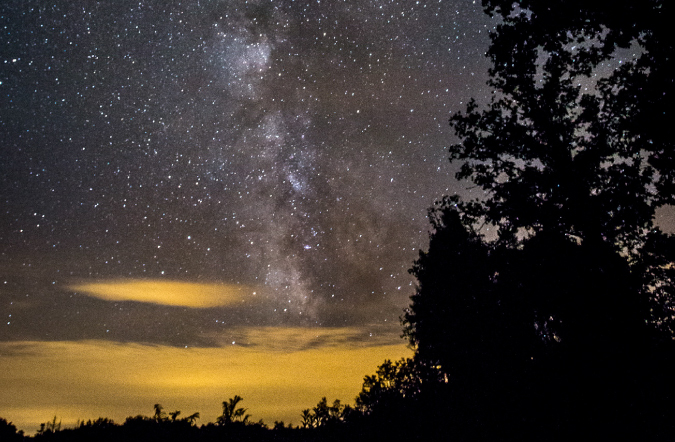
The stars and milky way over France

The Milky Way is an excellent subject for static star photography — it’s a natural leading line, as you can see in the shot above. This was a 30-second exposure at ISO 6400 and f/4, shot on a Canon 6D in manual mode.

Once you’ve gotten the hang of basic star photography, you can start to be a little creative. At these exposures, even a little light can make a big difference, so you can try “painting” objects with light, by using a flashlight and shining it on objects near you.

Part 3: High Dynamic Range (HDR) Photography

Have you ever noticed that sometimes your camera fails spectacularly to capture an image as your eyes see it? For example, the sky is too bright, or the shadows areas are too dark?

This is because our eyes have a much greater “dynamic range” than a camera has. Dynamic range is the difference between the darkest and lightest part of a scene that can be observed, and our eyes are able to resolve a much wider range in darkness and brightness than a camera can.

This is why you might end up with a shot that looks like this:
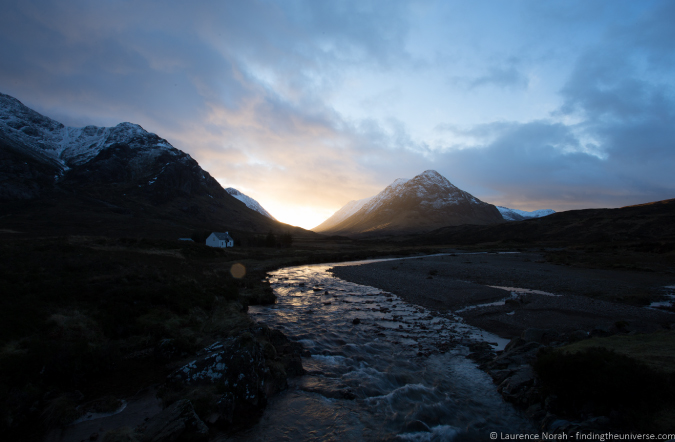
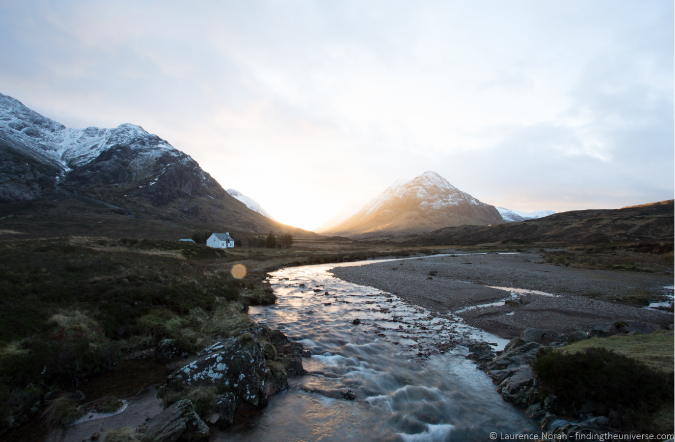
Photograph of a river and mountain

Or like this:

Photo of a river and mountain

…when in reality — to your eyes — the scene looked more like this:
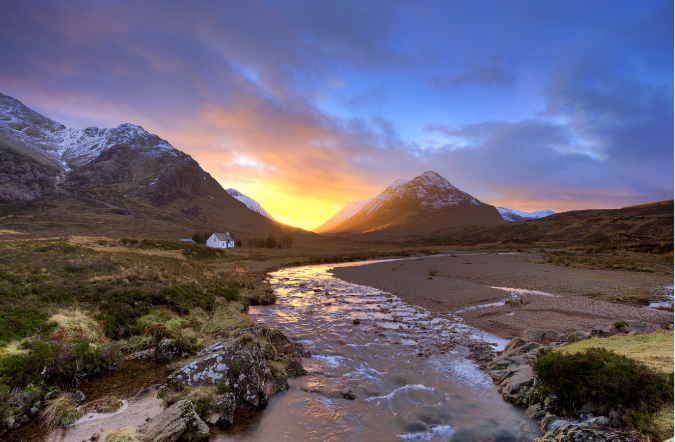
Photograph of a river and mountain and a colorful sunset

The problem is that cameras struggle to capture the full range of the exposure, from the dark shadows through to the bright highlights. Either the sky will be a white washout, or the landscape will be dark and unrecognizable.

The solution is a technique known as high dynamic range photography or HDR. This simply requires you to take multiple photographs of the same scene at different exposures, and then put them together. This is also known as exposure blending.

If you have a relatively modern smartphone or camera, then it will probably have an HDR mode built in. The iPhone, in particular, has an excellent HDR mode. You can access this from the settings menu in your camera or smartphone menu. On a Canon camera for example, the menu is as follows:
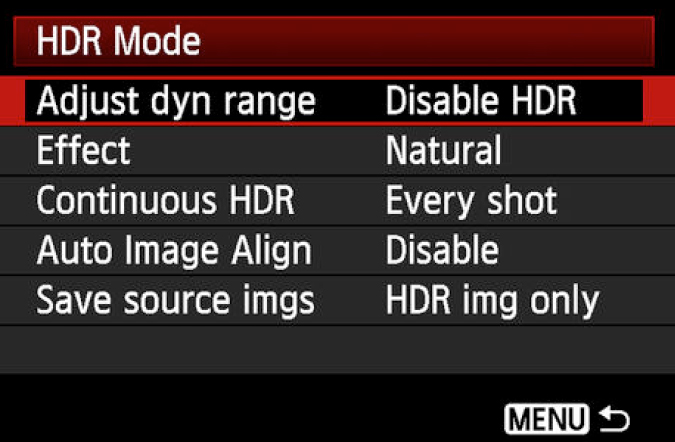
HDR mode menu options on a gopro hero

Using your device in HDR mode is very simple, and it will do everything for you. Your device will take the necessary number of photos, align them if necessary, and then blend them together to give you a photo that looks more representative of the scene you saw.

The disadvantage of this is that you are leaving the camera to make all the decisions, and you won’t usually have the source images — you’ll just be presented with the final HDR image, and your camera will discard the interim files.

If you want more control over the final image, then you’ll need to set your camera to “bracket” the exposures for you. This will allow you to take a sequence of photos of different exposures just by holding the shutter down. To find this mode in your camera, look in the menu for auto exposure bracketing, or AEB.

Then you’ll have to use computer software to merge the images together into a single photo. There are a variety of software tools available to merge your images. I use Lightroom, Photoshop, and Photomatix Pro, but there are many others out there.

Shooting multiple photos at once does mean you need either a very steady hand or — you guessed it— a tripod. If your hand moves between the shots, then the images will likely need to be aligned, which doesn’t always work perfectly. In addition, be aware of moving objects, as these can create odd ghost effects as the software tries to combine images.

HDR works best in largely static, high-contrast scenes, particularly landscapes where there isn’t much movement and the difference in brightness between the darkest and lightest parts of the scene is pronounced.

Part 4: High Contrast Photography

Speaking of high-contrast scenes, don’t forget that you can use these to your advantage. You don’t have to use HDR; instead, you can use all that light to create wonderful silhouettes of your subjects.

This is a great way to get a different take on a subject, and used creatively can give you some standout images.
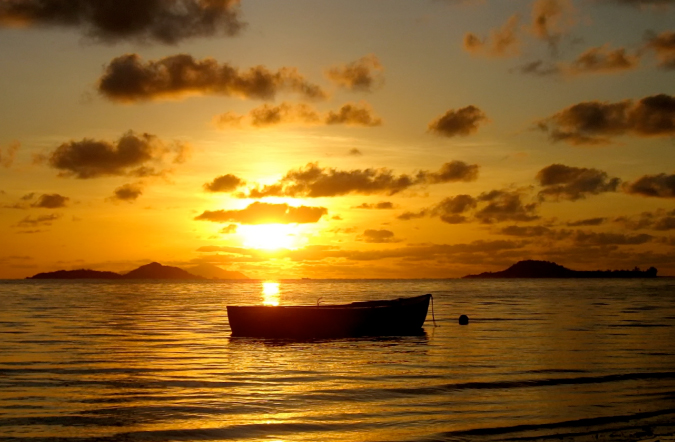
Stunning boat silhouette at sunset in the Seychelles

The shot above is the silhouette of a boat against two islands in the Seychelles. Shooting directly into the sun like this means that you are going to have to decide which area of the shot you want to correctly expose. If I had set up the shot so the boat was correctly exposed, the sky would have been a giant white mess as a result of the light from the sun.

I could, of course, have shot an HDR image, but in this case, a silhouette of the boat and two islands was a more attractive composition.

Other great subjects for silhouetting are people, trees…really, any object with a distinctive outline.

This sort of shooting will require a little practice, as the camera won’t know what sort of exposure you want. The joy of digital is that you can review a shot and try it again — particularly in a scene like this, where you have a bit of time to get the shot right before the sun sets. Be aware that your exposure meter might be indicating that you are over- or underexposing the scene.

The easiest way to get good results is to shoot in manual mode and set everything yourself. Keep the ISO rating as low as possible, and adjust your shutter speed and aperture according to the composition you want to achieve, considering the depth of field and any long-exposure effects you might be trying to achieve.

***

I use all the above travel photography techniques on a regular basis when I’m out and about in the world, looking to put a fresh perspective on a familiar scene. Admittedly, these are individually complex subjects to tackle, and it will take time to master each of them, but the rewards are very much worth it. Just start by picking one technique and work on it as often as you can. With regular practice, it will become second nature and you can move on to another. Travel photography is a slow process, but it’s a rewarding one if you’re willing to put in the work. If you aim for progress and not perfection, you’ll be taking better (and more advanced) travel photos in no time!

Laurence started his journey in June 2009 after quitting the corporate life and looking for a change of scenery. His blog, Finding the Universe, catalogs his experiences and is a wonderful resource for photography advice! You can also find him on FacebookInstagram, and Twitter.

More Travel Photography Tips!

For more helpful travel photography tips, be sure to check out the rest of Laurence’s travel photography series:

LEARN TO GET OUT OF AUTO!

capture the world photography courseIf you are looking to really get into photography and want to master your camera and take amazing photos when you travel, Laurence and I have developed a comprehensive photography course that will get you out of auto and have your friends go “Wow! That’s really breathtaking!” in no time. Click here to learn more about it!

Book Your Trip: Logistical Tips and Tricks

Book Your Flight
Find a cheap flight by using Skyscanner or Momondo. They are my two favorite search engines because they search websites and airlines around the globe so you always know no stone is left unturned.

Book Your Accommodation
You can book your hostel with Hostelworld. If you want to stay elsewhere, use Booking.com as they consistently return the cheapest rates for guesthouses and cheap hotels. I use them all the time.

Don’t Forget Travel Insurance
Travel insurance will protect you against illness, injury, theft, and cancellations. It’s comprehensive protection in case anything goes wrong. I never go on a trip without it as I’ve had to use it many times in the past. I’ve been using World Nomads for ten years. My favorite companies that offer the best service and value are:

Looking for the best companies to save money with?
Check out my resource page for the best companies to use when you travel! I list all the ones I use to save money when I travel – and I think will help you too!

The post How to Take the Perfect Photo: Advanced Techniques appeared first on Nomadic Matt's Travel Site.

19 Free (Or Cheap) Things to Do in Reykjavik

A view of Reykjavik
Posted: 12/8/2018 | December 8th, 2018

There’s no question that Iceland is an expensive destination to visit. But that doesn’t mean a trip there has to break the bank.

There are plenty of ways to save money during your visit to Iceland, including during your stay in the cozy capital city of Reykjavik.

Home to just 125,000 people, Reykjavik is a small city that is bustling with life and activities all year around. It’s artsy, cute, fun, and just filled with an awesome energy!

Whether you’re visiting Reykjavik on a weekend city break or planning to head out and explore the entire country,  there are plenty of ways to save money during your stint in the city!

To help you do that, here are my favorite free (or cheap) things to do in and around Iceland’s awesome capital:

Free Things to Do in Reykjavik

a hiking trail in Reykjavik
1. Take a Free Walking Tour
One of the best ways to start a trip to a new city is to take a walking tour. You’ll get to see the main sights, learn some history, and acclimatize to the culture. Plus, you have a local expert who you can ask questions to, which is an invaluable resource in and of itself!

The two companies I recommend are The City Walk and Free Walking Tours Reykjavik. You can’t go wrong with either. (Remember to tip your guide!)

2. Enjoy the Local Entertainment
Since the harsh climate forces many Icelanders to be indoors much of the year, they’ve developed a creative and artistic culture. There are lots of Icelandic painters, poets, writers, and musicians.  You can usually catch a free live show in Reykjavík at Café Rosenberg (sometimes there’s a cover charge at the door), Hlemmur Square Hostel (usually on Wednesday nights), KEX Hostel, HI Loft Hostel, and the Drunk Rabbit Irish Pub, which usually has someone who sings solo with his guitar.

3. Find Free Hot Springs
While the Blue Lagoon may be the most popular hot spring in the area, there are tons of others around the country that are free (or at the very least, less money than the Blue Lagoon). Visit the website Hotpot Iceland to find the best hot springs near the city. One nearby hot spring worth visiting is in Reykjadalur. It’s around a 40-minute drive from town and involves a bit of a hike to get there (about 30 minutes) but it’s much more secluded – and much less expensive – than the Blue Lagoon!

4. Hang out with the Locals
Iceland has a very active Couchsurfing community. I’ve stayed with hosts in Reykjavík as well as in Akureyri (Iceland’s main northern city). While many hosts are expats living in Iceland, it’s still a great way to save some money and get helpful local insights! Additionally, if you don’t want to stay with a stranger, there are usually weekly meet-ups you can attend! Make some friends!

5. Hit the Beach
Nauthólsvík is a man-made beach that not only has hot tubs but also a heated swimming area! It’s popular with locals and gets quite busy in the summer so make sure to come early to get a good spot. There is also a non-heated swimming area so if you’re feeling brave you can test the waters (spoiler: it’s cold).

6. Hike Mount Esja
If you’re looking to stretch your legs, head up Esja. The summit sits around 900m above sea level, offering you some amazing views of the city and surrounding area. Located just 10km from the city, the hike will take a couple of hours but the views are definitely worth it! Just make sure you check the weather as it’s unwise to hike during rain or snow.

7. Visit the Harpa Music Hall & Conference Center
Opened in 2011, this cultural and social center is worth checking out just to see the architecture for yourself. You can also catch the Iceland Symphony Orchestra, Reykjavik Big Band, and the Icelandic Opera here. The venue also hosts tons of other shows and performances as well, so check their website for an up-to-date schedule (performances will have a fee).

Austurbakki 2, +354 528 5000, en.harpa.is. See the website for perforamnce dates and times.

8. See Reykjavík’s Botanical Gardens
The city operates this beautifully-designed botanical garden that is home to over 5,000 plant species. You’ll also see ponds, birdlife, and beautiful flora dotting the small garden. There’s also a café nearby that’s open in the summer that features dishes made with herbs and spices grown on-site in the garden.

Laugardalur, 104 Reykjavík, +354 411 8650, grasagardur.is. Open daily from 10am-3pm (10pm in the summer).

9. Visit the Grótta Lighthouse
This lighthouse sits at the edge of the city and is a wonderful place to bird watch and gaze out at the stretching Atlantic ocean. It ’s a long walk along the coast from the city center but the scenic view and gorgeous coastal walk are definitely worth it. If you’re visiting in the winter months, this is also a great place to see the northern lights!

10. Walk (or Bike) the Coast
Reykjavík is a small city and its coastline is walkable (or bikeable if you want to rent one). Some great stops along the way are the Nauthólsvík Geothermal Beach and the Seltjarnarnes Peninsula. If you’re not interested in biking around by yourself, feel free to take a bike tour instead. Iceland Bike is the best bike tour company for this!

11. Visit Perlan
This is a dome-shaped building called “The Pearl” and it offers another great place to get a view of the city and surrounding area! On clear days you can see as far as Snæfellsjökull, the 700,000-year-old glacier-capped volcano that sits on the western coast of the island. Inside the dome, there is a cocktail bar and restaurant, so it makes for a nice place to go out and enjoy the view.

12. See the Sun Voyager
This iconic statue sits, known as Sólfar in Icelandic, was built in 1990 by Icelandic sculptor Jón Gunnar Árnason. It’s his interpretation of discovery, using the design of a traditional Viking ship to represent the promise of discovering new territory and the freedom that comes with traveling to new worlds.

13. Experience the Northern Lights
If you’re visiting Reykjavik between October and March you’ll have a good chance of seeing the Aurora on a clear night. You’ll want to get away from the city a bit to have the best view, as the light pollution will make it hard to see.

Cheap Things to Do in Reykjavik

Hallgrímskirkja chruch in Reykjavik
14. Take in the View from Hallgrímskirkja
This church is one of the most memorable that I’ve seen. The stark concrete façade was designed to mimic the Icelandic landscape (which I think it does quite well). It was named after the 17th-century clergyman and Icelandic poet Hallgrímur Pétursson, who wrote the Hymns of the Passion. It’s the tallest building in Reykjavík, and, for a small fee, you can go up to the top to get incredible shots of the city and its multicolored rooftops.

Hallgrímstorg 1, +354 510 1000, http://www.hallgrimskirkja.is/. Open daily from 9am-9pm in the summer and 9am-5pm in the winter. Entrance into the church is free but entry to the tower is 1,000 ISK for adults and 100 ISK for kids. The tower is closed on Sundays during mass.

15. Visit the Reykjavík Punk Museum
This museum is housed in an old underground public bathroom (seriously) and is dedicated to the punk and new wave scene that started took root here in the late 70’s. The museum highlights how many of Icelandic’s famous musical performers (like Björk) can be traced back to their punk roots. It’s definitely worth a visit.

Bankastræti 2, 101 Reykjavík, +354 568 2003, thepunkmuseum.is. Open Monday to Friday from 10am-10pm and weekends from 12pm-10p. Admission is 1,000 ISK for adults and free for kids 15 and under.

16. See the National Gallery of Iceland
If you’re a fan of art, especially modern art, you won’t want to pass up a trip here. The museum is focused on Icelandic artwork from the 19th and 20th century and highlights the diverse nature of the art scene in Iceland. While it is mostly local artists, some foreign works are showcased here as well.

Fríkirkjuvegur 7, 101 Reykjavík, +354 515 9600, listasafn.is. Open daily from 10am-5pm in the summer and from 11am-5pm in the winter (closed Mondays in the winter as well). Admission is 1,500 ISK for adults, 750 ISK for seniors and persons with disabilities, and free for kids age 18 and under. Buy one ticket for 1,500 ISK valid for three museums: The National Gallery of Iceland, the Sigurjón Ólafsson Museum, and the Ásgrímur JónssonCollection.

17. The Icelandic Phallological Museum
This is one of the weirdest museums you’ll ever have a chance to go to – which s partly why you should go! Entirely not sexual, the museum has collected penises from varies species roaming the earth, land, and sea. The founder, an Icelandic historian named Sigurdur Hjartarson, started the penis museum as a joke but it’s become something much more. The whole museum is pretty small so you won’t need more than 30-60 minutes, but it’s pretty interesting and informative; you’ll actually learn a lot about how species procreate (in addition to seeing a lot of…well, exhibits).

Laugavegur 116, 105 Reykjavík, +354 561 6663, phallus.is. Open daily from 10am-6pm. Admission is 1,500 ISK for adults, 1,000 ISK for seniors and persons with disabilities, and free for kids 13 and under.

18. Head to Videy Island
This is a small island located just off of Reykjavík. It’s a great little island for a picnic or a stroll if you’re looking for something a bit off the usual tourist trail. The island is most famous for the Imagine Peace Tower, envisioned and built by Yoko Ono. On each 9th of October, Yoko Ono comes to light the tower on the birthday of John Lennon, and it is lit until December 8th, the day John was killed. The ferry is operated by daily in the summer and on the weekends in the winter.

Skarfabakki Pier and Ægisgardur Harbor, +354 519 5000, elding.is/videy-ferry-skarfabakki. Round-trip tickets are around 1,550 ISK for adults, 775 ISK for students aged 7-17, and free for kids under age 6. On October 9th, the ferry trip is free for everyone in honor of the Imagine Peace Tower ceremony.

19. Visit the Saga Museum
Iceland was first inhabited by Norwegian Vikings in the 9th century. The high-action wax sculpted scenes are an interesting way to learn about Viking times when life was hard and dependent on the harsh elements, and people were poor. It’s a good family activity.

Grandagardur 2, 101 Reykjavík, +354-694-3096, sagamuseum.is. Open daily from 10am-6pm. Admission is 2,100 ISK for adults, 1,600 ISK for students and seniors, and 800 ISK for children.

***

By taking advantage of these free and cheap activities (as well as some money-saving tips) you’ll be able visit Reykjavik without blowing the bank. Sure, there are plenty of things to see and do in Reykjavik that are worth spending money on, but if you mix and match those activities with these budget-friendly ones you’ll be able to visit the Land of Fire and Ice with your wallet still intact.

Book Your Trip to Iceland: Logistical Tips and Tricks

Book Your Flight
Find a cheap flight by using Skyscanner or Momondo. They are my two favorite search engines because they search websites and airlines around the globe so you always know no stone is left unturned.

Book Your Accommodation
You can book your hostel with Hostelworld. If you want to stay elsewhere, use Booking.com as they consistently return the cheapest rates for guesthouses and cheap hotels. I use them all the time. My favorite places to stay in Reykjavik are:

  • Hlemmur Square – A posh hotel with a great bar and traditional Icelandic communal dinners several times a week.
  • Kex Hostel – Has a café and bar with an awesome happy hour, a comfy lounge, and a heated patio.

Don’t Forget Travel Insurance
Travel insurance will protect you against illness, injury, theft, and cancellations. It’s comprehensive protection in case anything goes wrong. I never go on a trip without it as I’ve had to use it many times in the past. I’ve been using World Nomads for ten years. My favorite companies that offer the best service and value are:

Looking for the best companies to save money with?
Check out my resource page for the best companies to use when you travel! I list all the ones I use to save money when I travel – and I think will help you too!

Looking for more information on visiting Iceland?
Check out my in-depth destination guide to Iceland with more tips on what to see, do, costs, ways to save, and much, much more!

The post 19 Free (Or Cheap) Things to Do in Reykjavik appeared first on Nomadic Matt's Travel Site.
My Top Gifts for Travelers for the Holidays

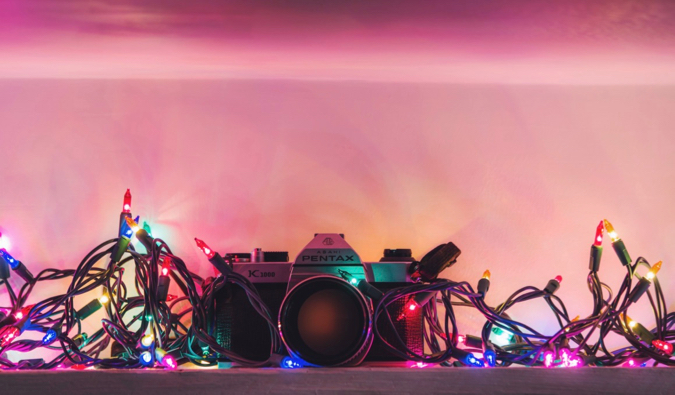
A small digital camera wrapped in Christmas lights in front of a bright pink background
Last Updated: 10/30/23 | October 30th, 2023

Travelers can be a fickle group of people to buy gifts for. We’re constantly coming and going, we usually don’t carry a lot of stuff with us, and no two travelers are alike. Finding the perfect gift for the traveler in your life can be tricky.

While a plane ticket is never a bad idea (I’m a window seat in case anyone is thinking of getting me one), I’ve put together this ultimate gift guide for travelers as there’s a lot of great travel gear out there these days that helps people travel cheaper and better.

Even me, the gear-adverse traveler, likes a lot of this stuff!

This is stuff I actually think is super useful. No nonsense. No fluff. Just the best gifts for intrepid travelers and globetrotting nomads.


Gifts Under $25

1. A Travel Lock

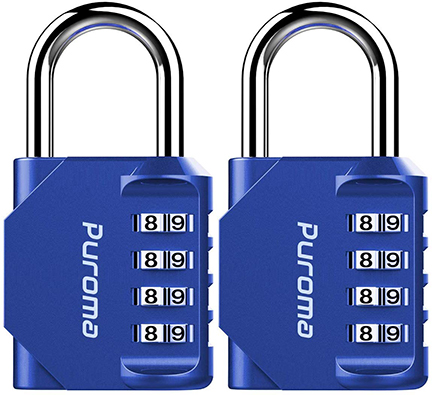
Master travel padlockThis simple item is one of the most important for the budget traveler. Since many hostels have lockers, backpackers need to have their own travel lock when they’re on the road. While you can usually rent them at hostels, those prices add up after a while. I never leave home without a lock because I know it will come in handy.

Buy now on Amazon!


2. Loop Earplugs

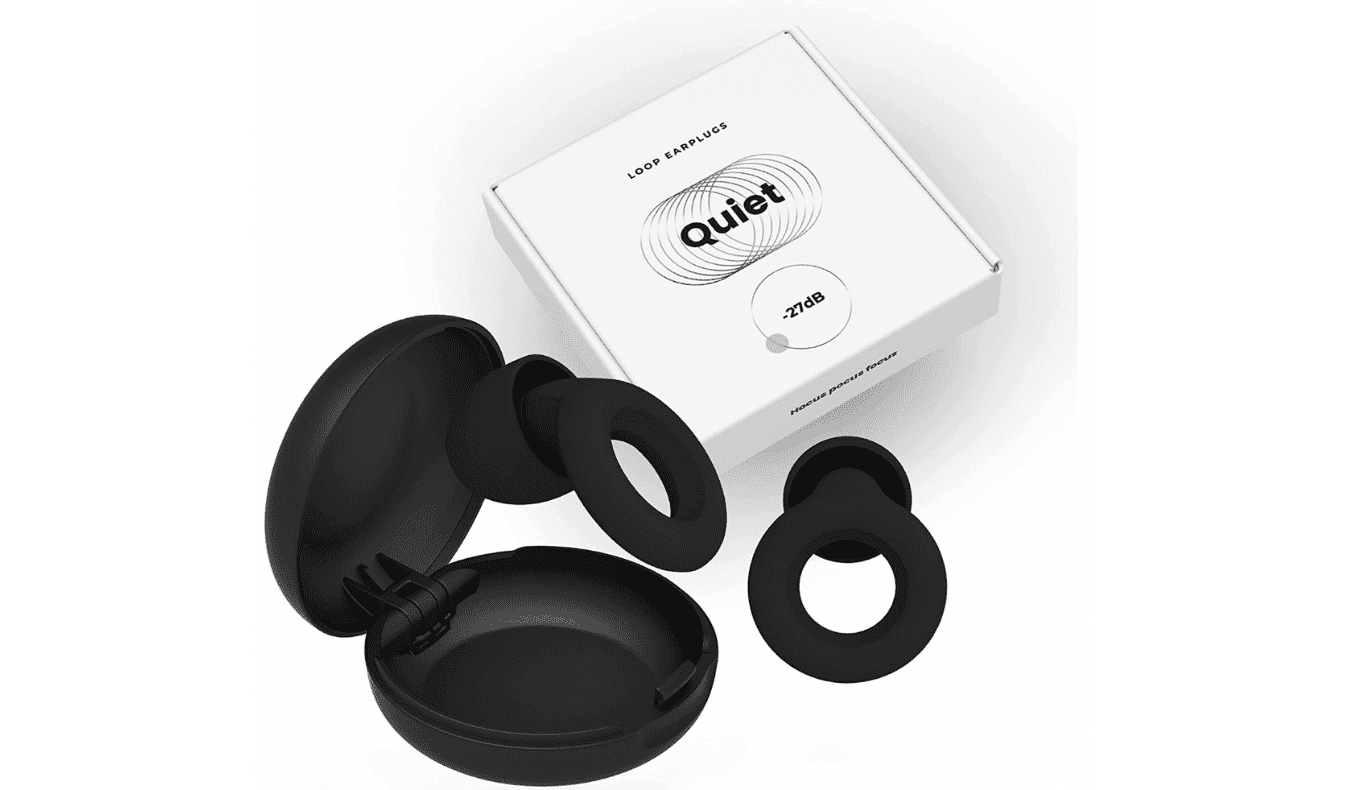
travel ear plugsAnyone who has ever stayed in a hostel knows that a quality pair of earplugs is a necessity. From chronic snorers to late-night drinkers to copulating couples in creaking bunks, hostels are known for their less-than-quiet accommodation. I suggest investing in good earplugs and not just the cheap foam ones. Not only will they help you sleep, but they’re great for bus trips and flights as well as wearing as you explore louder, more hectic cities.

Buy now on Amazon!


3. Travel Adapter

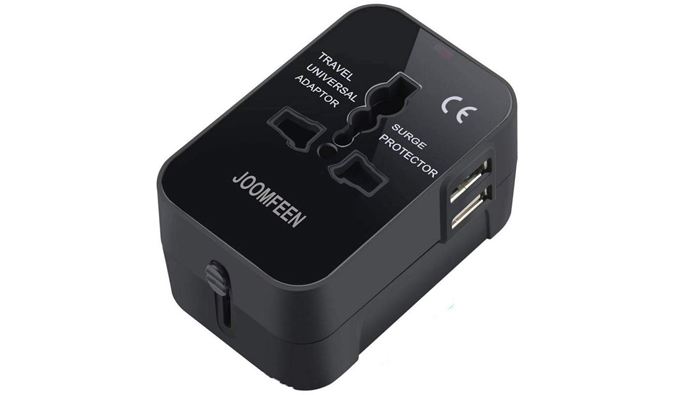
travel adapterNothing is more tedious than arriving to a new destination only to realize you can’t charge your devices because the electrical outlets are different. That’s why you’ll need a travel adapter. They’re a simple accessory. There’s a million out there but this is one I use as it covers every region of the world and comes with USB ports too. It’s cheap, easy to use, and lightweight. Everything you need in an adapter.

Buy now on Amazon!


4. Scratch Travel Maps from Landmass

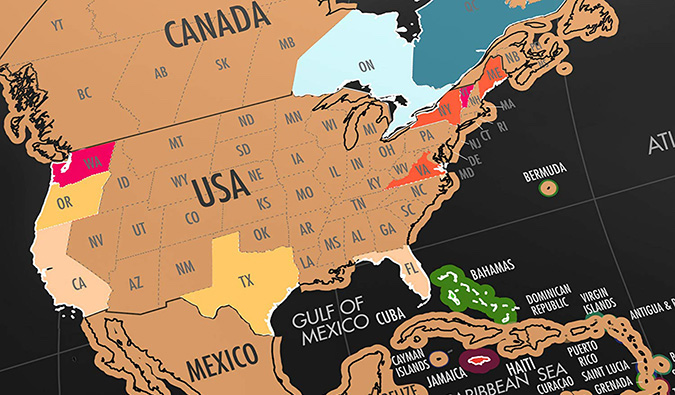
travel scratch mapScratch maps are a fun way to keep track of your past travels while helping you stay inspired as you plan your future trips. You simply scratch off the parts of the world you’ve been. Simple. Easy. Landmass is my favorite company that makes these, though there are plenty of other companies that make them now so you can find them in all sorts of sizes and colors.

Buy now on Amazon!


5. Passport Holder

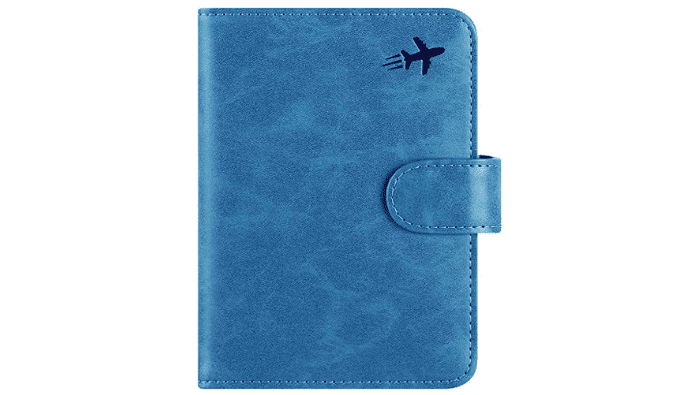
A blue passport walletA passport holder is a must-have for any avid traveler. Not only does it protect your passport from wear and tear, it makes your travels much more convenient. Most passport holders have slots for your travel credit cards as well as any cash you have, making it a safe and convenient way to keep your valuables secure while you travel. While there are tons of expensive and fancy passport holders out there, a simple one will get the job done and save you money in the process (money you can spend on more travels!).

Buy now on Amazon!


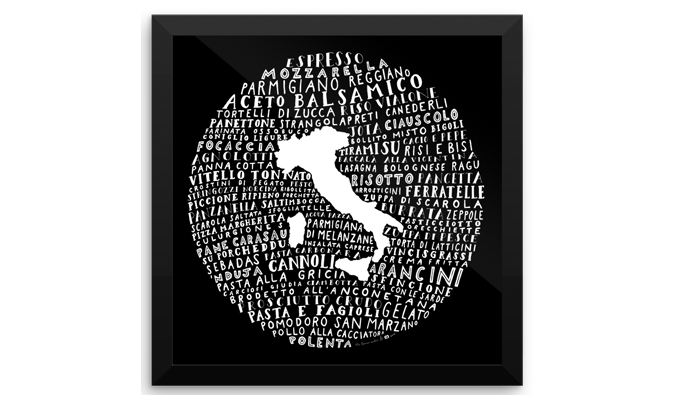
6. Hand-drawn Food Maps

hand drawn food maps from Legal NomadsThese are unique, hand-drawn typographic maps of food from Legal Nomads and artist Ella Frances Sanders. They make a thoughtful gift for anyone who loves to eat and travel (and who doesn’t!). They come in a variety of sizes too! Jodi’s maps are the best!

(Use code NOMADICMATT to save 10%)

Buy now at Legal Nomads!


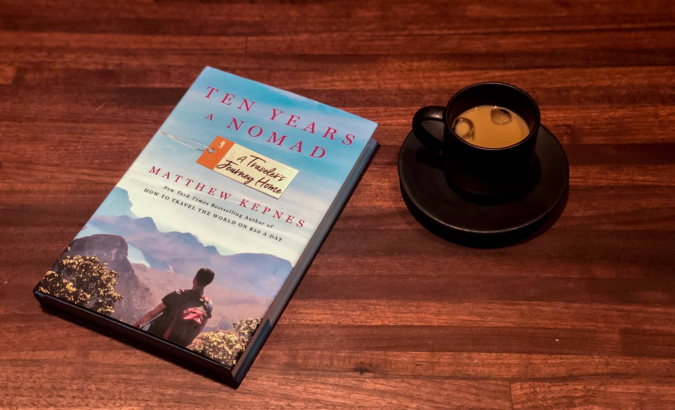
7. Ten Years a Nomad (and Other Travel Books!)

$50 a day by Matt KepnesThis book is my memoir about my ten years traveling and backpacking the world, my philosophy on travel, and the lessons I learned that can help you travel better. It takes you on a trip around the world from start to finish: getting the bug, the planning, setting off, the highs, the lows, the friends, what happens when you come back — and the lessons and advice that come with all that. People have been really enjoying and connecting with it and I think you or any other traveler would love it!! (Plus, getting it helps support everything we do here!)

Buy now on Amazon!

Buy now on Bookshop!

 
For more travel book suggestions, you can check out my list of recommend reading on Amazon and Bookshop (I have hundreds of book suggestions there!).
 

8. Celiac Travel Cards

Legal Nomads celiac logoMy friend Jodi from Legal Nomads created these helpful travel cards for anyone traveling with Celiac disease. They are in-depth resources that communicate your concerns to restaurant staff in a way that allows anyone traveling with the disease to have a worry-free meal. If you or someone you love has Celiac disease, these travel cards are a useful resource!

(Use code NOMADICMATT for 10% off!)

Buy now at Legal Nomads!


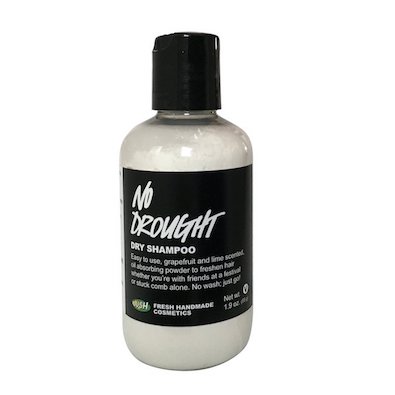
9. Dry Shampoo

Lush's dry shampoo in a clear plastic bottle
Dry shampoo is a convenient liquid-free alternative to regular shampoo. It’s a useful minimalist solution for budget travelers who travel carry-on only and an eco-friendly choice as well. Natural dry shampoos absorb the grease and oil in your hair, keeping it clean while you’re on the road — and with minimal effort too. It works for all types of hair and hair lengths as well so you don’t need to shave your head or do anything drastic either.

Buy now at Lush!


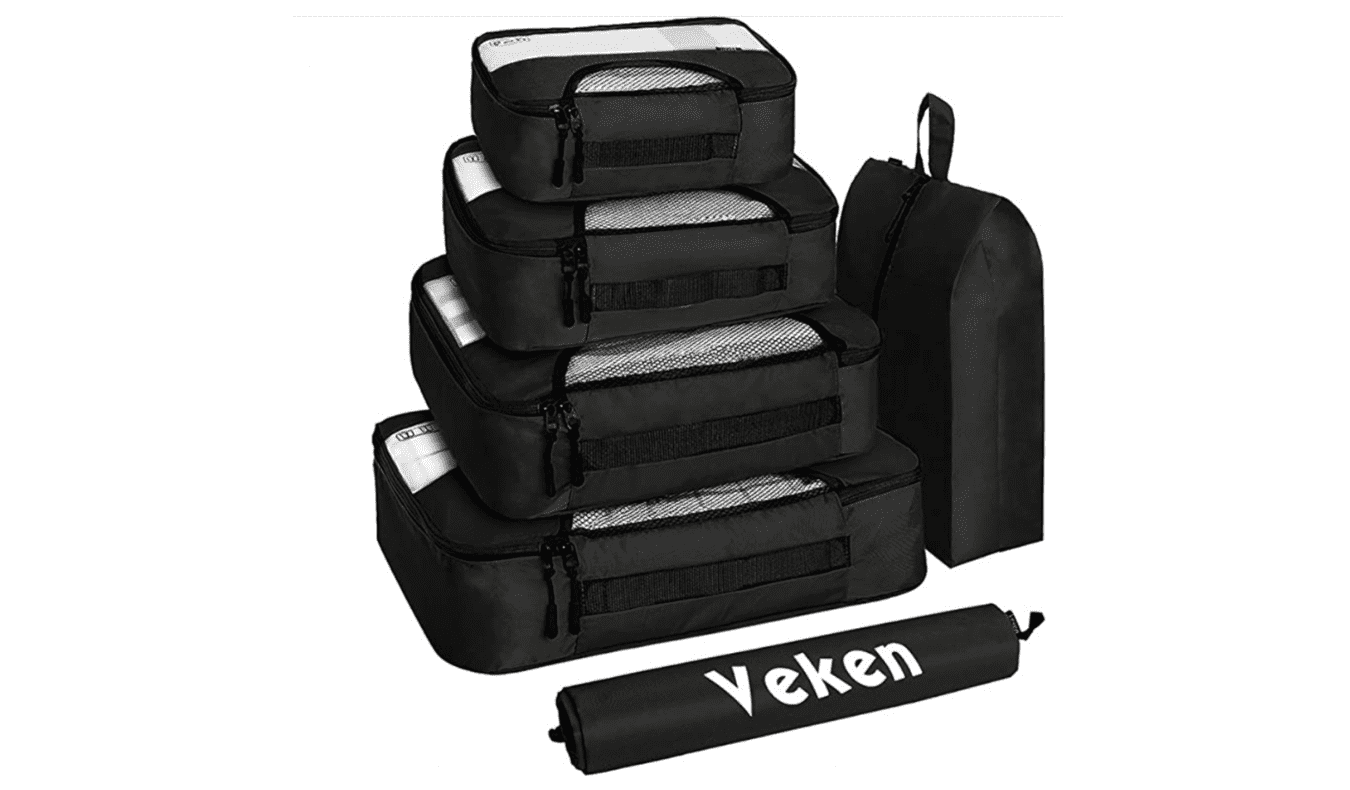
10. Packing Cubes

travel packing cubesPacking cubes are an awesome tool to help you stay organized while you travel. Whether you’re a budget backpacker or traveling with half a dozen suitcases, packing cubes will keep you organized as you travel the world. They come in a variety of sizes, allowing you to store items big and small. If you know a traveler who needs a hand staying organized, this is the gift for them!

Buy now on Amazon!


11. Exploration Journal

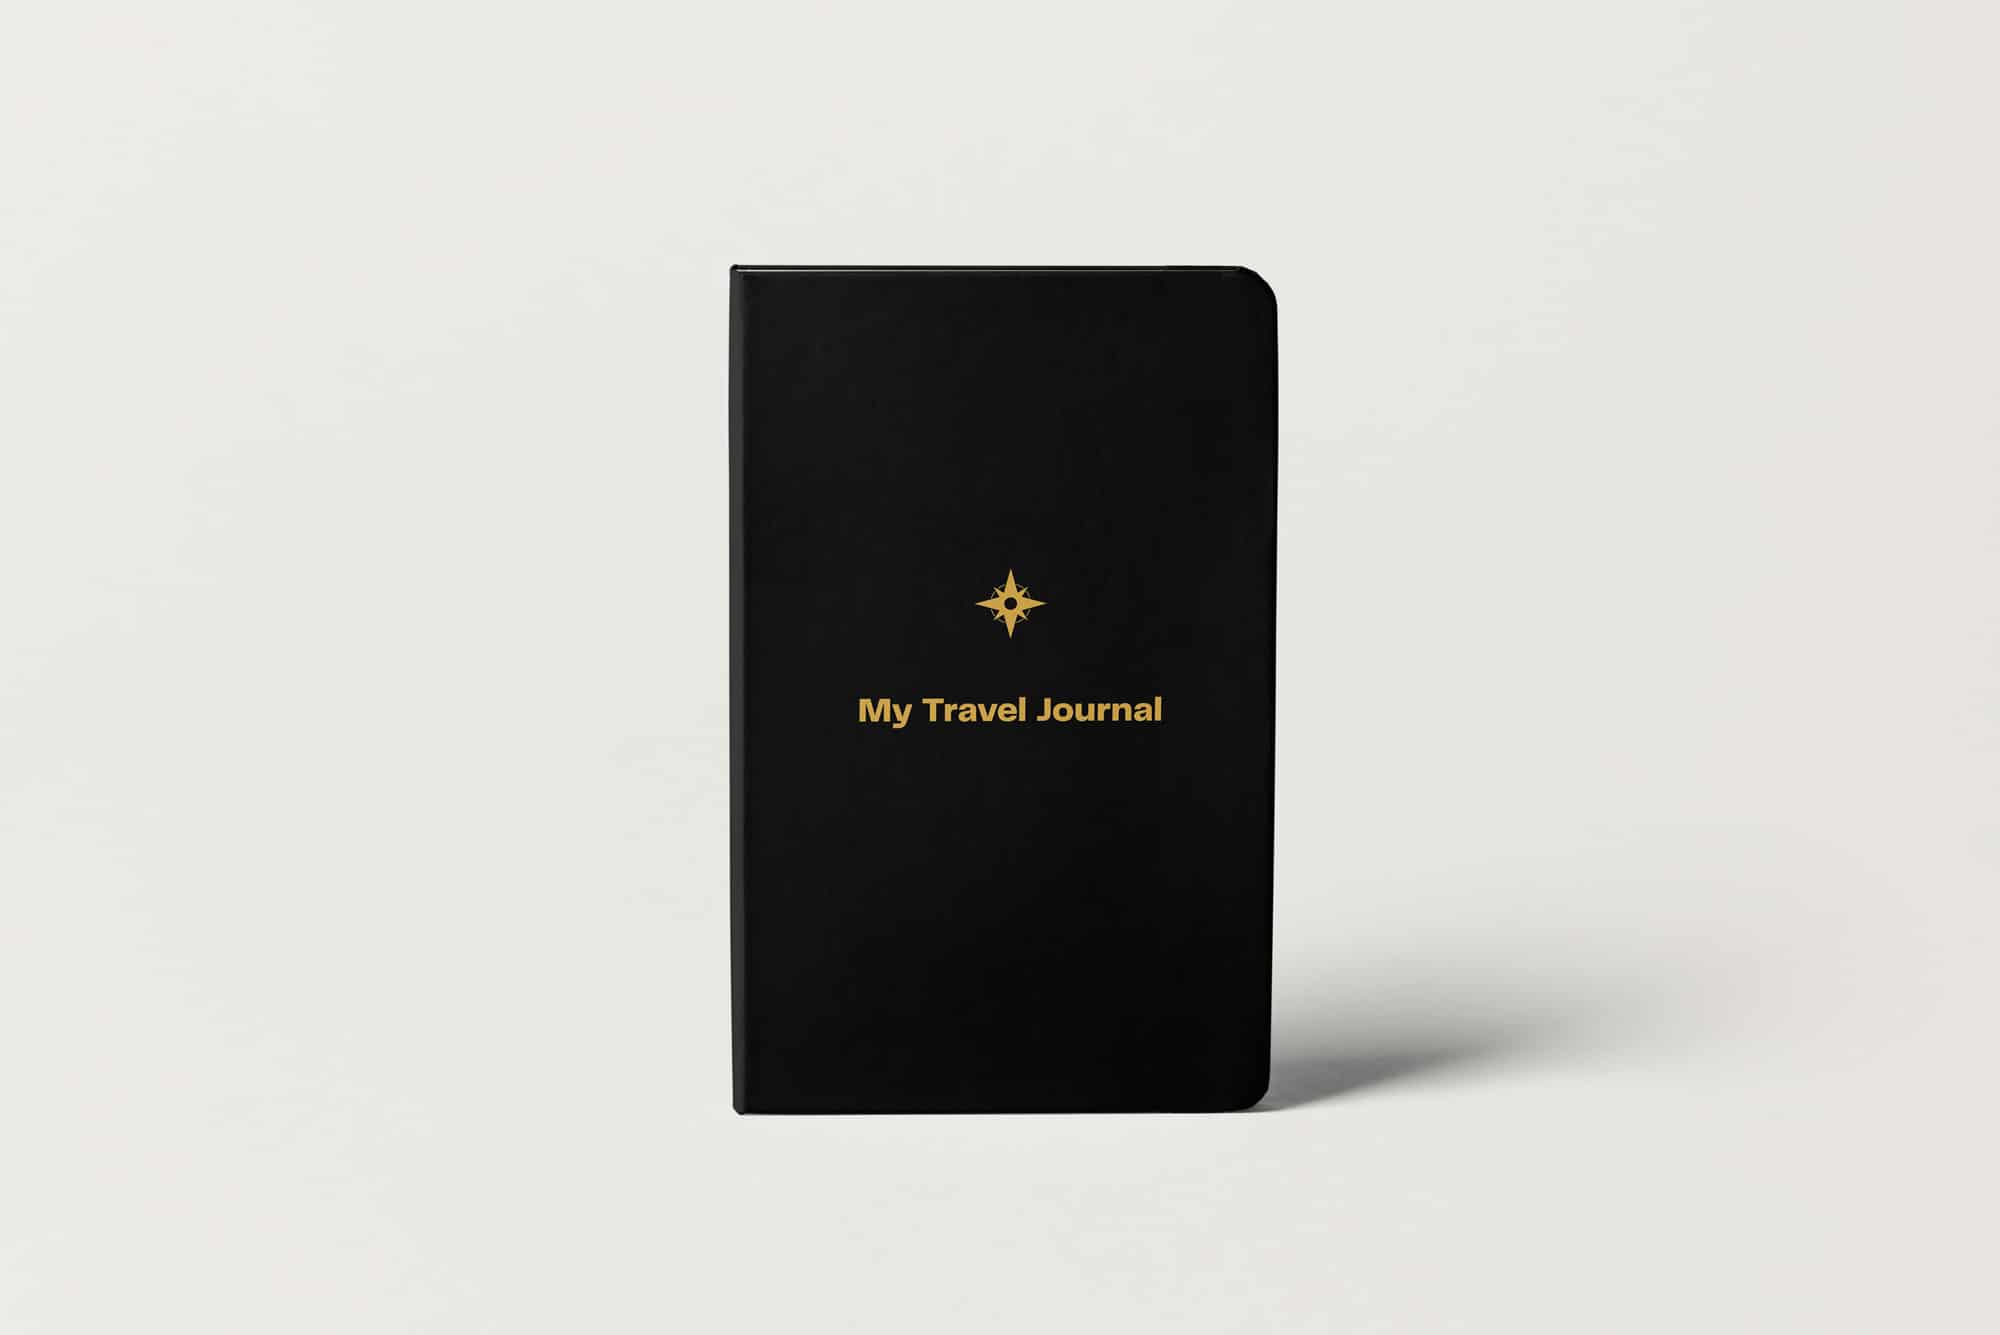
The Remember Your Travels travel journalIf you want a travel journal that isn’t just blank pages (like my boring moleskine) but rather has space for itinerary planning, places to jot notes in the local language, inspirational quotes, and much more, grab our new travel journal. It was designed specifically with travelers in mind, so you can take notes and write down stories and reflections during your travels. It’s the perfect gift for the avid traveler!

Buy now at Remember Your Travels!


Gifts Under $100

12. HostelPass

The homepage for the website HostelPassFor the traveler heading to Europe, consider gifting a HostelPass. This discount card offers over 130 discounts to hostels in 40 cities throughout 15 countries in Europe. With HostelPass, travelers can save up to 40% on accommodation. It’s the discount card I wish existed when I first started backpacking around Europe and is perfect for budget traveler planning a trip around the continent.

Buy now at HostelPass!


13. DryFox Quick Dry Travel Towel

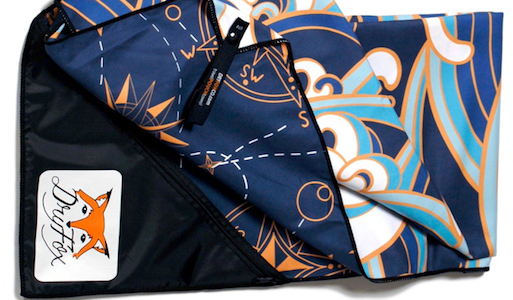
sea to summit travel towelUnless you’re only staying at hotels or using Airbnb, you’re going to need to bring a towel when you travel. Having a lightweight, quick-drying towel makes a huge difference when you’re on the road since regular towels are too bulky and heavy (and they take a long time to dry). Get a travel towel for your next trip so you can travel light. They’re a compact, quick-drying solution that every backpacker needs.

(Use code “nomadicmatt” for 15% off your purchase!)

Buy now at DryFoxCo!


14. Menstrual Cup

A menstrual cup being held by a womanMenstrual cups are reusable, eco-friendly feminine hygiene products. While I can’t speak to their effectiveness personally, tons of female travelers I know are huge fans. It can be a hassle trying to find the products you need while abroad, making this a simple, effective, and affordable addition to your toiletry kit.

Buy now on Amazon!


15. Trtl Travel Pillow

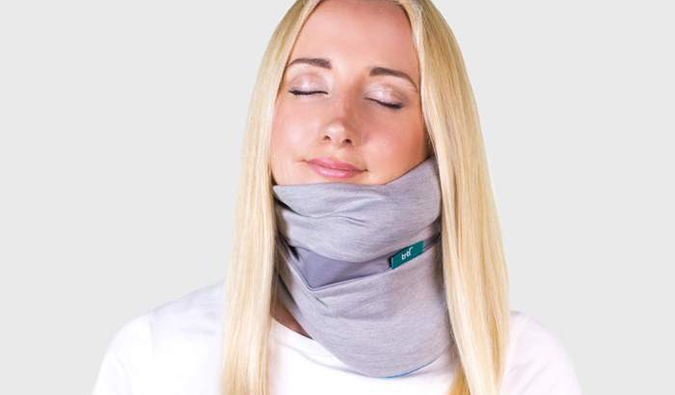
a comfortable travel pillowTravel pillows are perfect for those long-haul flights, delayed buses, and airport naps. Every traveler needs to have a travel pillow on hand to maximize that downtime and time in transit, and Trtl pillows are the best on the market. They help prevent jet lag and make even the longest, most uncomfortable trip a little more bearable.

Buy now on Amazon!


16. Travel Headlamp

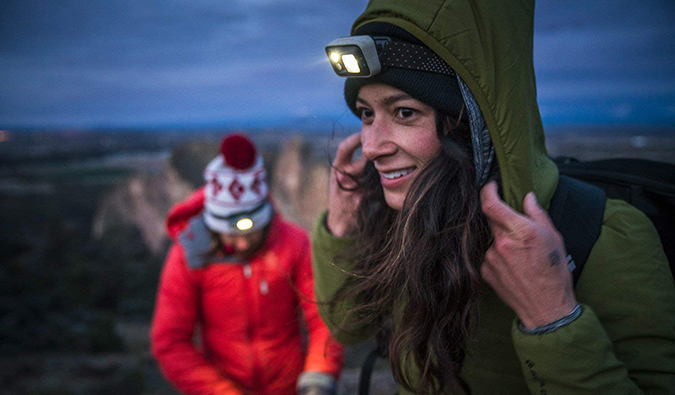
travel head lampThis is a handy tool for both backpackers and anyone looking to do any hiking or camping. In a hostel, a headlamp is helpful if you need to check in or out but don’t want to disturb your fellow travelers. For outdoorsy folks, they’re useful for hiking, setting up camp in the dark, and for emergencies.

Buy now on Amazon!


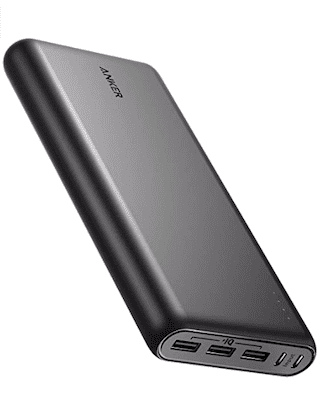
17. External Battery

Anker external batteryThese days, we all travel with numerous electronic devices like phones and tablets. It can be hard to keep them all charged. An external battery solves that problem. Two high-output USB ports make this external battery incredibly convenient, and it can charge most phones up to 6 times in one go!

Buy now on Amazon!


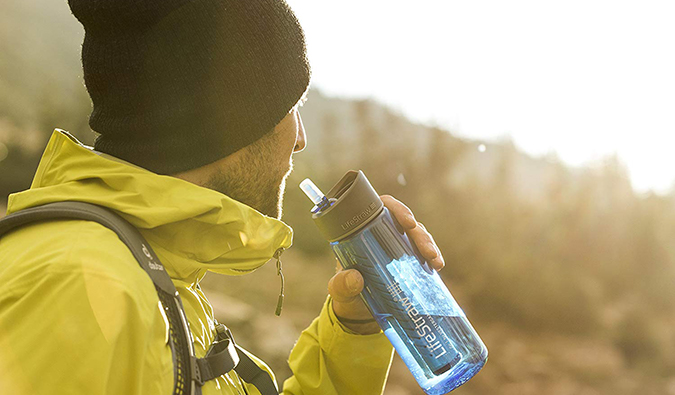
18. LifeStraw

lifestraw water filterEnvironmentally, pollution from single-use plastics is something every traveler has witnessed. And, monetarily, when you’re traveling, continuously buying water gets expensive. Do your part to help the planet by traveling with a reusable filter. LifeStraw is an awesome brand with a built in water filter. The filters last 5 years so you save money on changing them too.

Buy now on Lifestraw!


19. Superstar Blogging

Superstar BloggingIs there someone on your list looking to start a new career? Why not give them a leg up and enroll them in Superstar Blogging! We offer comprehensive courses on blogging and travel writing that outline everything you need to know to succeed in the travel industry. You’ll learn from me and other top travel experts on how to level up your game, reduce mistakes, get you heard above the noise faster, and make more money.

Buy now on Superstar Blogging!


Gifts Over $100

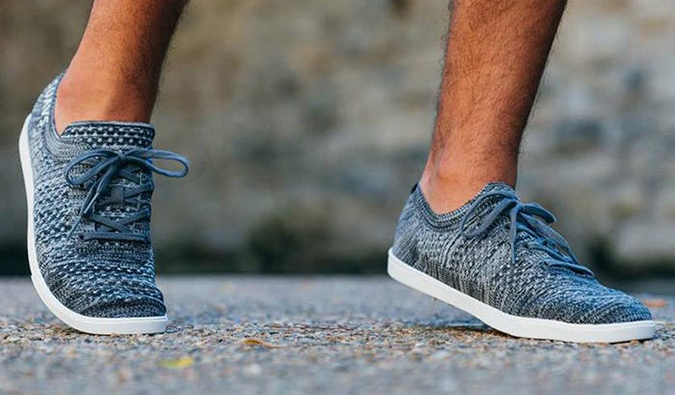
20. Suavs shoes

suavs shoesSuavs shoes are super versatile and durable, making them perfect for traveling. Whether you’re just exploring the city or in need of something that looks a bit fancier, these shoes can do it all so you don’t have to pack multiple shoes. They are flexible, light, washable, and breathable. I love them! (They look great too!)

Buy now at Suavs!


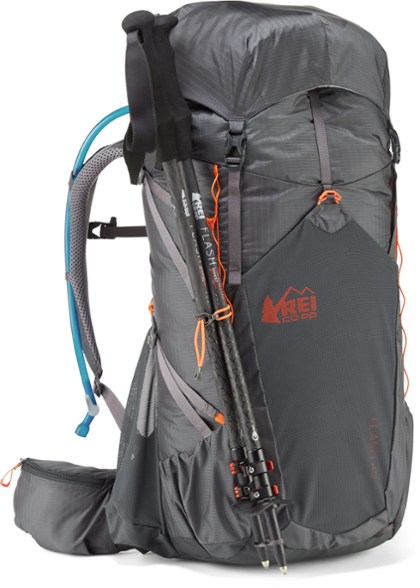
21. Travel Backpack

REI Flash travel backpackIf you’ve got a budget traveler on your holiday list, a travel backpack is the gift that keeps on giving. A well-made bag will last for years and through dozens of adventures. Having a reliable travel backpack is one of the most important items for a traveler.

My favorite bag is the Flash 55 from REI but other companies that make high-quality bags include Osprey, Nomatic, and MEC (for Canadians).

Some bags worth checking out are:

(For a different backpack, check out my guide finding the right backpack for more options!)
 

22. Travel Clothing from Unbound Merino

Unbound Merino wool shirtThese travel clothes are some of the most versatile on the market. Made from merino wool, Unbound offers clothing that can be worn daily for weeks (and months!) without getting smelly. They are perfect for the traveler who wants to pack lighter. I really love the material, they’re comfortable, they hardly ever need a wash, and they last forever!

Buy now at Unbound!


23. MacBook Air

MacBook Air laptopThis is my favorite travel computer. It’s light, it’s powerful enough for regular use, and the battery life lasts a long time. While an iPad might be another potential travel choice, I find the Air much more versatile — especially with their new M2 chip. You can just do a lot more with it. When I’m on the road, this is the laptop I travel with.

Buy now on Amazon!


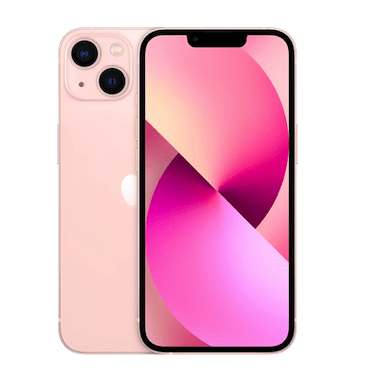
24. iPhone

The new iPhone 13While not a cheap phone, the iPhone has such a high-tech camera that you don’t need to take a traditional camera with you when you travel. It has a solid battery life, a great lens, beautiful screen, and, overall, is just awesome. True, I’m an Apple fanboy so I might be biased but hey, it’s my list!

Buy now on Amazon!

 
For a non-Apple phone with an equally awesome camera, check out the Google Pixel. It has an excellent camera!
 

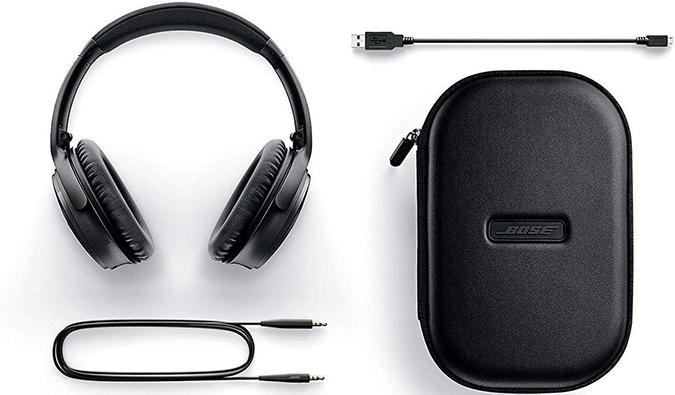
25. Noise-Canceling Headphones

Bose QC35 headphonesThese are ideal for those long flights or bus trips as they block out background noise so you can read, work, or sleep without being disturbed. The wireless Bose QuietComfort 45 headphones are fan favorites and my go-to brand. They are comfortable, rechargeable, and do an amazing job at removing background noise. If you’re on a budget, consider the QuietComfort 25 instead.

Buy now on Amazon!


26. Kindle

a kindle from AmazonWhile I personally prefer to read physical books, I can’t argue against the convenience and simplicity of the Kindle. Hauling around physical books is a pain if you’re traveling often. With a Kindle, you can pack over 1,000 books into a single device and many versions can also use apps and access the internet. It’s a wonderful gift for the avid reader.

Buy now on Amazon!


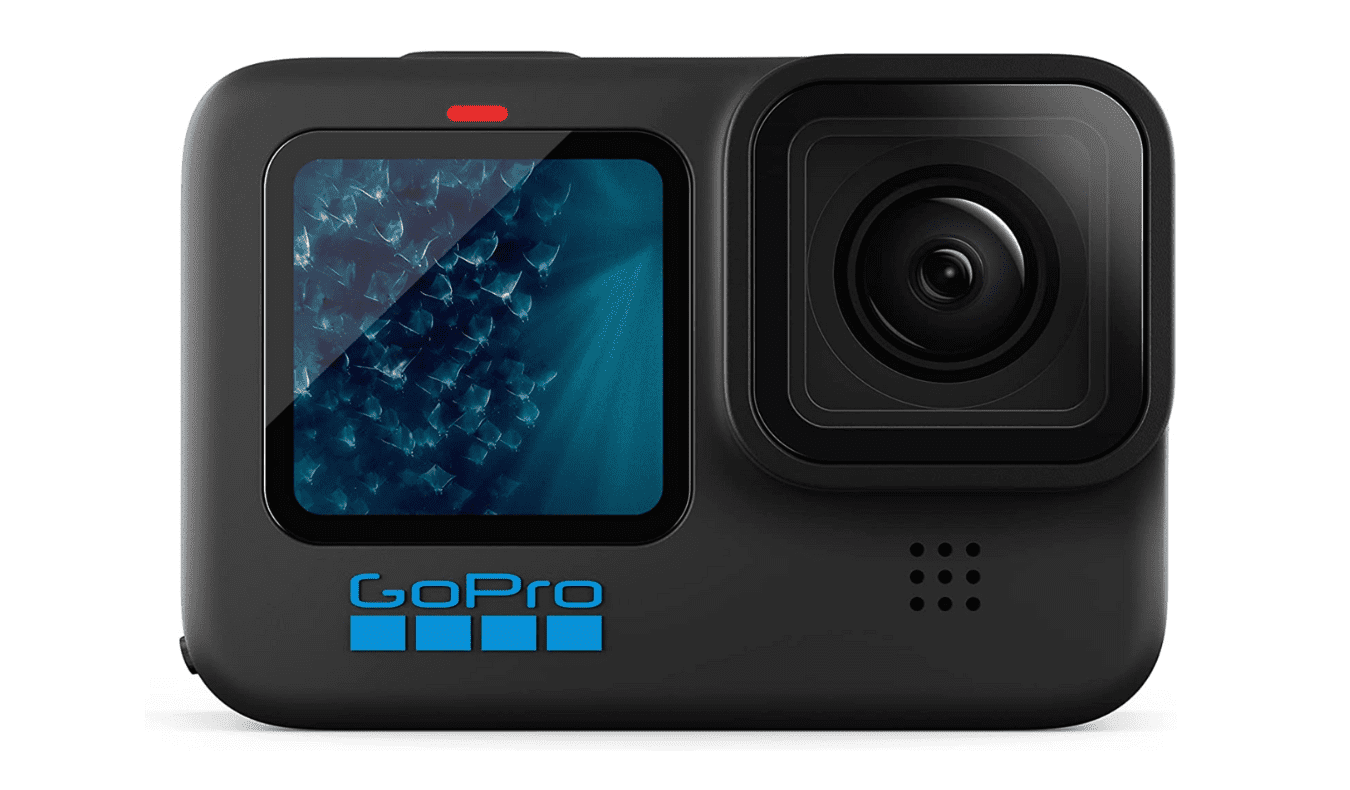
27. GoPro Hero 11

gopro hero 11 photoEvery traveler needs a camera, and few are as versatile and durable as the GoPro. They’re incredible for photos and video no matter the climate. They’re waterproof and are perfect for both everyday city exploring as well as more extreme and adventurous activities. They’re just awesome. If the Hero 9 is too pricey, grab the 8. It’s just as good and a bit cheaper!

Buy now on Amazon!

***

Whether you’re searching for the perfect holiday gift for a traveler in your life or just looking for some inspiration for yourself, this list will help you find an awesome gift. No matter your budget, there is something here for you to help you level up your travels or the travels of a loved one.

Book Your Trip: Logistical Tips and Tricks

Book Your Flight
Find a cheap flight by using Skyscanner. It’s my favorite search engine because it searches websites and airlines around the globe so you always know no stone is being left unturned.

Book Your Accommodation
You can book your hostel with Hostelworld. If you want to stay somewhere other than a hostel, use Booking.com as it consistently returns the cheapest rates for guesthouses and hotels.

Don’t Forget Travel Insurance
Travel insurance will protect you against illness, injury, theft, and cancellations. It’s comprehensive protection in case anything goes wrong. I never go on a trip without it as I’ve had to use it many times in the past. My favorite companies that offer the best service and value are:

Want to Travel for Free?
Travel credit cards allow you to earn points that can be redeemed for free flights and accommodation — all without any extra spending. Check out my guide to picking the right card and my current favorites to get started and see the latest best deals.

Ready to Book Your Trip?
Check out my resource page for the best companies to use when you travel. I list all the ones I use when I travel. They are the best in class and you can’t go wrong using them on your trip.

The post My Top Gifts for Travelers for the Holidays appeared first on Nomadic Matt's Travel Site.
Camera Gear: The Travel Cameras and Accessories to Buy

Photographer and gear set up near the ocean
Updated: 12/2/2018 | December 2nd, 2018

Today, professional photographer Laurence Norah of Finding the Universe, continues his five-part series on taking better travel photos. Many of you are looking to improve your travel photography so Laurence is here to help us do just that. In this post, Laurence goes in-depth on how to pick the perfect travel camera and gear for your trip.

There is a belief that better photography gear will equate to better photographs. While this is certainly the case in specific situations, the reality is that it is the skill of the photographer that makes all the difference. A pro-level camera in inexperienced hands will likely result in worse photographs than those taken by someone using an iPhone.

Knowing how to compose a great photo and how to use your camera properly are the two most important parts of taking a great photo, with the camera gear itself coming next in importance after these two.

Sometimes, gear does make a difference, particularly for situations such as fast-moving subjects or when there is less light available, in which case you might need a camera with a bigger sensor or a lens with a wider aperture. This is why you often see sports or wedding photographers carrying such expensive-looking equipment. But for your average travel photograph, the gear isn’t going to be the definitive factor. Rather, it’s important to get the right gear for you, your budget, and your skill level.

How much money do you want to spend?

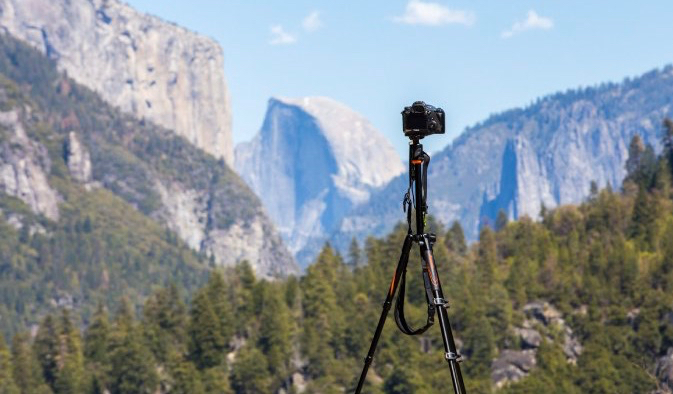
Camera and tripod set up in front of a mountain and nature
There’s no point spending time looking at gear that isn’t in your budget. Set yourself a budget before you begin, and don’t forget to factor in lenses, memory cards, spare batteries, filters, and other accessories.

There is a law of diminishing returns, with a sweet spot currently of around $500–1,000 USD for a solid setup that will do everything you need.

Consider these price guidelines for all the equipment you’ll need:

  • Budget: $150–300 USD
  • Value: $300–500 USD
  • Mid-range: $500–1,000 USD
  • High-end: $1,000+ USD

How much gear are you willing to carry?

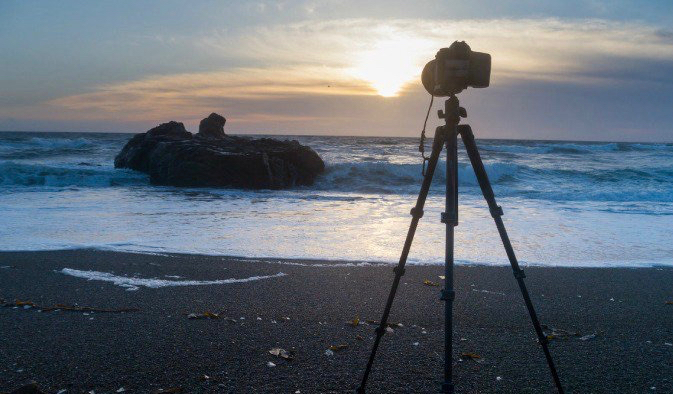
Tripod and camera set up on a natural beach overseas
Weight is a serious consideration, and you have to be brutally honest with yourself about what you are willing to carry with you. I’ve often met people taking pictures with their smartphone who say they have a nice expensive DSLR sitting back in their hotel room that was “too heavy to bring out today.”

If you’re not the kind of person who wants to carry a heavy device, then don’t buy one in the first place. The best camera is always the one you have on you, so if you think you’re going to mostly just be keeping it light, then just invest in a decent smartphone or simple point-and-shoot.

For reference, your smartphone probably weighs around 6 oz., a point-and-shoot 8 oz., a mirrorless system with a lens around 16 oz., and a full DSLR system around 30 oz. or more.

The heavier the equipment, the higher the quality of construction, particularly of the optical elements, leading to higher-quality images. However, unless you are planning on selling your work for high-resolution printing, the difference probably won’t be noticeable.

This is another moment to be honest with yourself. Learning how to use a camera properly takes time, and if you don’t want to do that, then don’t invest in an overly expensive or complicated camera.

I’ve seen people with rigs costing in excess of $5,000 USD, shooting away in auto mode and wondering why the folks with the iPhones are getting better results. More expensive gear does not automatically equate to better photos!

There’s no exact science to figuring out how difficult a camera is to use, but difficulty indicators include costing more, having more buttons, and having a massive manual. The more complicated the camera, the more control that you have, but the harder it will be to achieve good results without investing time and effort into learning.

11 Best Cameras for Travel

The main difference between camera types is the size of the sensor inside the camera — the larger the sensor, the better the camera will perform in lower light, and the bulkier and more expensive it will be.

The following list is roughly ordered by sensor size, from small (smartphones) to larger (SLRs).

  1. Google Pixel 2: I’ve used a lot of Android phones over the years, and Google’s Pixel 2 is a beast when it comes to mobile photography. It offers full manual control, a super f/1.8 aperture lens, the option to shoot in RAW file format, optical image stabilization, and even pretty good performance in low light.(Smartphone, $629
  2. iPhone X: I’ve never personally used an iPhone, but they are often lauded by friends as being superb for photography, with each iteration improving on the last. If you’re an Apple fan, you’ve probably already got one though. (Smartphone, $1,050)
  3. Sony RX 100 V: While this is by no means a cheap point-and-shoot, it is generally reviewed as the best in its class. This is due to having a much larger sensor than other models, meaning that the image quality is a lot better. If price is an issue, check out previous versions which come in a bit cheaper. (Point and shoot, $895)
  4. Canon Powershot Elph 190 IS: At the other end of the scale is this $100 USD point-and-shoot from Panasonic. It’ll get the job done, offers a 12x optical zoom, and will slip nicely into your pocket. Don’t expect National Geographic–quality shots though. (Point and shoot, $150)
  5. Canon Powershot G9X Mark II: Though it sits between the above two options in price, the G9 X Mark II comes a lot closer to the Sony in terms of image quality. Excellent battery life, rugged construction, and Wi-Fi round out the feature set. (Point and shoot, $430)
  6. GoPro Hero 7 Black: Despite other manufacturers’ attempts, there is only one option when it comes to action cameras, and that’s the GoPro. If the Hero 6 is too pricey, check out the Hero 6 which is very similar. (Action cam, $399)
  7. Nikon Coolpix B700: Nikon has an excellent reputation for superzooms, and this model has a crazy 60x optical zoom. It’s a good value option too, with solid reviews, so I have no hesitation suggesting this as an option if you want an all-in-one with scope for more control over your photography. (Superzoom, $450) (Here are some more options to consider at different price points.)
  8. Lumix GX7 or GX8: With a 16MP four thirds sensor, 4K video, touch screen, and Wi-Fi, the GX7 has everything you need for successful shooting with a mirrorless camera. (Mirrorless, $500-$1,200)
  9. Alpha 6300 or A7R III: If you’re on a budget but want to get your foot in the door, the a6300 is the camera for you. For someone with a higher skill level (and significantly higher budget), the A7R III is a top-notch choice, offering a full-frame sensor, super fast processing, a secondary SD slot, and improved battery life. (Mirrorless, $900-$3,200)
  10. X-T2: With an electronic viewfinder, flip-out screen, a secondary SD slot, and improved autofocus, this is a great mirrorless choice for anyone wanting a smaller camera but who still wants full manual control. (Mirrorless, $1,600)
  11. Canon EOS 6D Mark II: I shoot with two of these cameras and am always impressed by their performance, particularly in low light. They are the lightest SLRs with a full-frame sensor, and also have Wi-Fi and GPS, the latter being particularly handy for travel. (DSLR, $1,600)

Getting the Best Travel Lens

If you are buying a mirrorless or SLR system, then you’re going to have to buy a lens. Consider spending at least as much on the lens as the camera body, if not more.

I suggest buying the camera body by itself and then buying a lens to meet your needs rather than the “kit-lens” that might come with it.

A lens has two specifications: focal length and maximum aperture.

The smaller the number of the aperture, the more light the camera will let in, allowing you to achieve various effects (as I described in the second post in this series).

The focal length is the zoom factor of the lens — the bigger the number in mm, the more magnification the lens offers; the smaller the number, the less magnification.

What to look for in a lens

For travel purposes, I’d advise buying two lenses:

  • A cheaper “prime” lens with a fixed focal length of around 50mm and an aperture of 1.8, perfect for portraits or food.
  • A good-quality “walk-around” zoom lens with a wide focal range to let you get everything from wide landscapes to close-up shots of people. Something in the range of 24-105mm would likely do.

The Best Trevl Photography Accessories

Professional photographer getting ready to shoot a nature travel photo with a blue sky
You must factor in some money for purchasing accessories when buying a camera. I’d suggest the following:

  • Spare battery: Most camera batteries last for 300-500 shots, so if you think you’ll be taking a lot of photos and might be away from power for a few days, a second battery could ensure that you don’t miss a moment. I’d advise buying the battery from your manufacturer to guarantee compatibility. Price: usually around $30 USD.
  • External hard drive: Depending on the capacity of your laptop, you might find you need an external hard drive to store your photos. I travel with three Transcend ruggedized hard drives and store backups of my photos across two of them, as well as synchronize them to a cloud-based backup when I have fast enough Internet. Price: currently around $99 USD for a 2TB model.
  • Filters: Lenses aren’t cheap. Pick up a relatively inexpensive UV filter for the front of your lens, and if you scratch it, you’ll just need to replace the filter rather than the whole lens. I would also suggest investing in a polarizing filter (as I mentioned in the second post in the series). Price: the larger the filter, the more expensive it is. $10–100 USD, with Hoya, B+W, and Tiffen being respectable brands.
  • Memory cards: Memory cards are cheap, so pick up one or two Class 10 32Gb or 64Gb cards that’ll let you keep shooting for ages. I’ve not found much difference between brands, and have never had a card fail in all my years shooting. Price: $30 USD for 64Gb.
  • Tripod: A tripod can really expand your creative possibilities, letting you take longer exposures and play with time. Even a small travel tripod can reap dividends for your travel photography. Again though, if you don’t think you’ll use it, don’t buy one. Price: $100 USD will get you a perfectly respectable model. I use the VEO range of Vanguard tripods, which fit nicely into a bag and weigh around 5 lbs, with prices ranging from $100 to $350 USD.

***

Never forget that the most powerful photography tool is you — not your camera! I traveled the world with an old 10-megapixel Canon Rebel SLR for years, producing both award-winning and income-generating photography from — by today’s standards — a very basic bit of kit.

It is far more important to invest time in learning how to take better photos than throwing money at gear. Do your research, figure out your personal travel style, and pick the gear that is right for you, based on weight, price, and your personal learning goals.

If that camera turns out to be a smartphone, awesome. The best camera for traveling is the one you are going to be taking with you whenever you walk out your door and head into the world and the one that fits your budget.

Laurence started his journey in June 2009 after quitting the corporate life and looking for a change of scenery. His blog, Finding the Universe, catalogs his experiences and is a wonderful resource for photography advice! You can also find him on FacebookInstagram, and Twitter.

More Travel Photography Tips!

For more helpful travel photography tips, be sure to check out the rest of Laurence’s travel photography series:

LEARN TO GET OUT OF AUTO!

capture the world photography courseIf you are looking to really get into photography and want to master your camera and take amazing photos when you travel, Laurence and I have developed a comprehensive photography course that will get you out of auto and have your friends go “Wow! That’s really breathtaking!” in no time. Click here to learn more about the course and start today!

Book Your Trip: Logistical Tips and Tricks

Book Your Flight
Find a cheap flight by using Skyscanner or Momondo. They are my two favorite search engines because they search websites and airlines around the globe so you always know no stone is left unturned.

Book Your Accommodation
You can book your hostel with Hostelworld. If you want to stay elsewhere, use Booking.com as they consistently return the cheapest rates for guesthouses and cheap hotels. I use them all the time.

Don’t Forget Travel Insurance
Travel insurance will protect you against illness, injury, theft, and cancellations. It’s comprehensive protection in case anything goes wrong. I never go on a trip without it as I’ve had to use it many times in the past. I’ve been using World Nomads for ten years. My favorite companies that offer the best service and value are:

Looking for the best companies to save money with?
Check out my resource page for the best companies to use when you travel! I list all the ones I use to save money when I travel – and I think will help you too!

The post Camera Gear: The Travel Cameras and Accessories to Buy appeared first on Nomadic Matt's Travel Site.
12 Ways to Shoot the Perfect Travel Photograph

a woman taking a photo
Updated: 12/2/2018 | December 2nd, 2018

­Today, professional photographer Laurence Norah of Finding the Universe, continues his five-part series on taking better travel photos. Photographs are important for the memories they represent so Laurence is here to help us take better pictures! Part two of the series is on how to get the perfect shot.

In my first post in this series, I talked about the key compositional rules that you can use to create better travel photos. If you’re new to this series, I recommend you start there.

Today I’ll be covering how to deal with challenging light and some introducing some advanced ideas for controlling your composition, including being selective with your focus and making objects seem closer together than they are.

Then I’m going to get into specific tips for common travel scenes to get you taking better photos faster.

I’ll begin, though, by talking about the most crucial element of photography — the light. The middle of a sunny day might seem perfect for photography. In truth, it’s the worst time to take pictures — the light is harsh, shadows are challenging, and your photos will not do your subjects justice.

The best times to shoot are closer to sunrise and sunset when the light is soft and warm. These times are known as “the golden hour.”

You can’t be everywhere at the right time for the perfect light, especially when traveling. Here’s how to get the best shot from a bad lighting situation.

12 Ways to Take Better Photos

1. Be Aware of the Sun

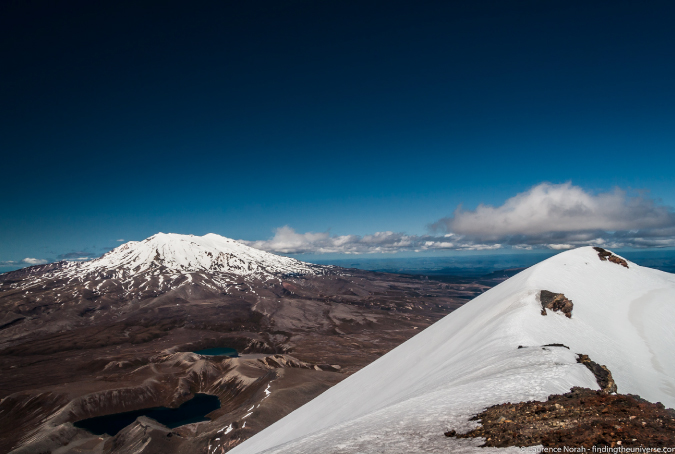
This is the most important tip of the lot. Ideally, you want the sun behind you so that your subject is fully lit. If the sun is behind your subject you’ll end up with a much darker, poorly lit image. While this can be done intentionally for effect, for most shots you’ll want the sun to properly light your subject. To do that, position yourself so you are between the sun and your subject, as I did in this shot from my journey around New Zealand:

beautiful travel photograph of a snow-capped mountain in New Zealand

2. Get Creative

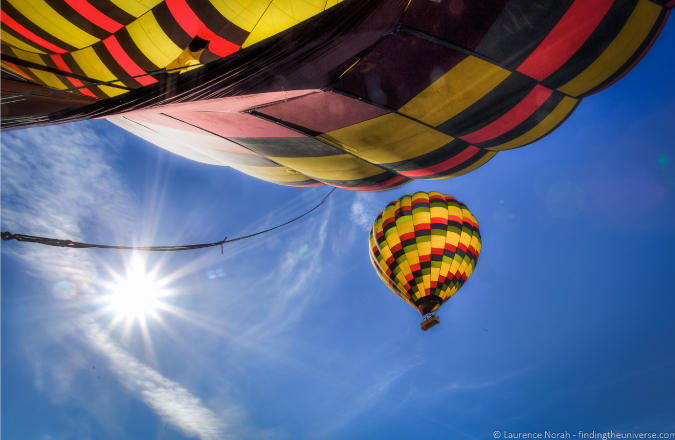
Don’t just take the same shot every time. Mix it up and get creative. Instead of having the sun behind you, take advantage of the harsh light for a more interesting image. Try shooting into the sun to create silhouettes, or use a high aperture to create a starburst effect, like in this Napa Valley balloon photo:

Dazzling picture of hot air balloons in Napa Valley, CA

3. Use the Weather

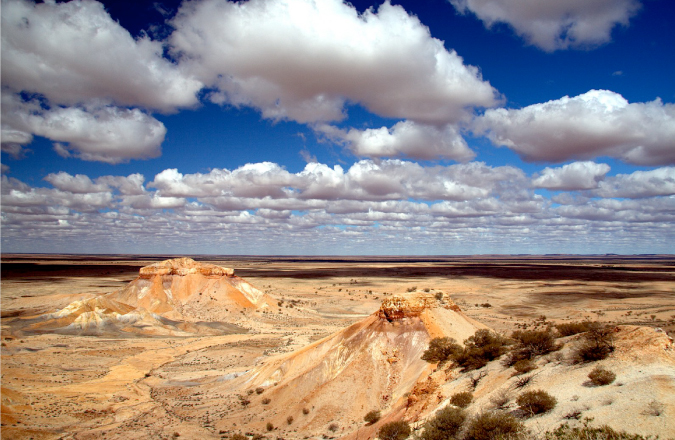
Think about how you can use the weather to your advantage. How can you embrace a grey sky or a rainy landscape to capture a unique photo? How can you snap a picture of a blue sky without it being boring? Be aware of the weather so you can adjust your style and subject accordingly. For example, when the sun is behind clouds, the light is diffused. Clouds also add interest and scale to otherwise plain, boring skies, as in this shot of the Painted Desert in Australia:

Using weather to a photographers advantage when taking a pic of the mountains and sky Painted Desert

4. Seek Shade

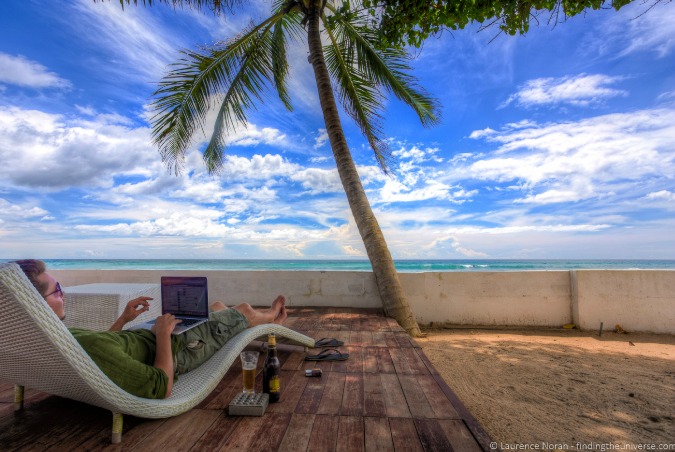
If you’re taking pictures of people, find somewhere shady. Here the light will be more even, with fewer harsh shadows on faces. You’ll get a much smoother and more balanced photo. Just make sure you are mindful of where your light is and how dark your subject will be. Here’s an example from the middle of the day in Sri Lanka:

Remote worker working on a laptop traveling to a beach location

5. Master Depth of Field

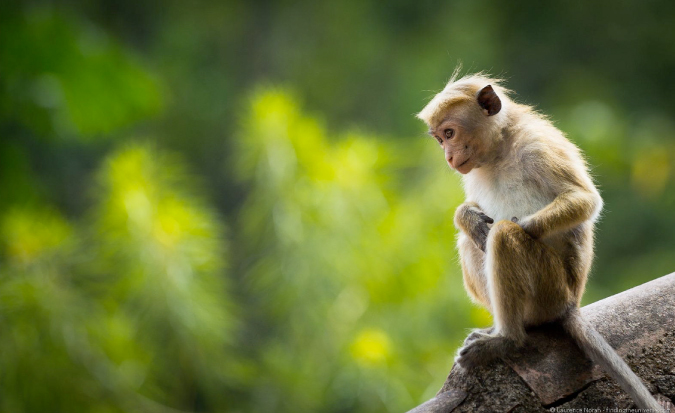
Depth of field is all about controlling which parts of the shot are in focus. It’s one of the most important photography concepts you’ll need to know if you want to improve your travel photography and capture that perfect shot. Mastering depth of field will allow you to compose a variety of shots just by changing where your focus is. For example, check out this shot of a monkey:

Cute monkey photographed while traveling

As you can see, only the monkey is in focus. This is known as a “shallow” depth of field and is used to isolate subjects and make the shot about them.

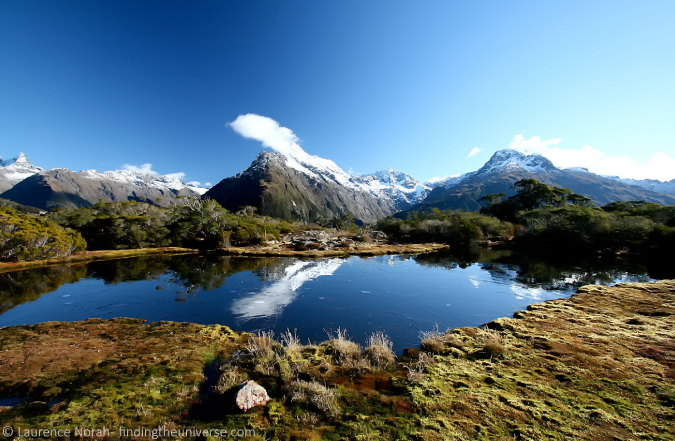
A wide depth of field is for shooting landscapes and scenery. Here’s a shot from New Zealand where I used a wide depth of field to get much more of the scene in focus:

Stunning travel photo of a mountain range in New Zealand

To manipulate depth of field on your camera you need to change the aperture — check your manual for how to do that. Typically it will be marked as “Av” or “A” on your mode dial.

Some smartphones allow you to manually set your aperture, either through the built-in camera app, or by downloading an advanced app from your device’s app store.

A wide-open aperture (f/4 and lower) produces a shallower depth of field (less of the shot will be in focus), and a smaller aperture (f/8 and higher) puts more of the scene in focus.

There are plenty of tutorials on the Internet about depth of field; take a look here for a more detailed explanation, and here for a depth of field simulator to get more of a handle on what it is.

6. Utilize Street Scenes

Street photography is about capturing moments — immersing yourself in environments and finding interesting stories.

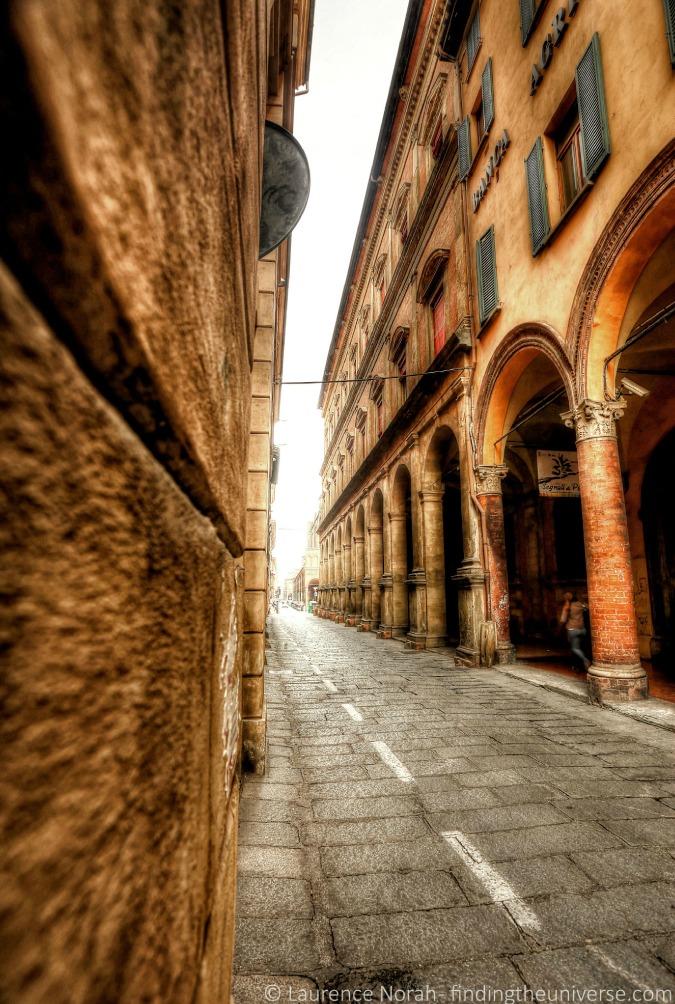
Patience and politeness are key to successful street shots involving people — not everyone wants to have their photograph taken, and it may be illegal to do so without explicit permission. If no one wants their photo taken, try wider crowd shots, or focus in on market goods — colorful spice piles or unusual-looking goods are always interesting subjects. Alternatively, shoot the streets themselves. Doorways or intriguing architecture are a nice starting point — take this street in Bologna, Italy, for example:

Stunning travel photo of gorgeous street in Bologna, Italy

As for the settings, use a wider depth of field (smaller aperture) for general street scenes.

7. Learn to Photograph People

If you’re looking for portraits, your best bet is to make friends with people. Learn about them and their stories, then ask for that permission.

I prefer taking pictures of people I know, as I generally don’t have to worry about permission problems.

My favorite style of people photos is “candid,” unposed shots. This is the best way, in my opinion, of capturing the personality of people.

Candid travel picture of two people hugging at a party

The key to the art of unobtrusive photography is persistence, patience, and keeping your eyes open to the photographic possibilities around you. Anticipating the moments that might be about to happen is key.

I’d advise a shallow depth of field (wide aperture) and fast shutter speeds for portraits and action shots of people.

8. Use Beaches

Beaches are one of my favorite spots to shoot sunsets — nothing quite beats the sun setting over the sea! The water and the wet sand make for great reflection opportunities.

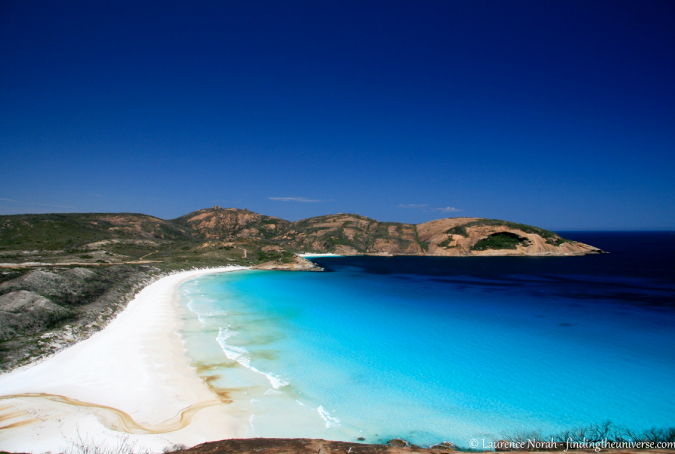
Think carefully about your composition, and in particular the foreground and mid-ground of your shot, as I talked about in the composition post. Try different angles, and maybe get above your subject to present the beach in the context of its environment, like this shot of Hellfire Beach in Western Australia:

Shot of sunny Hellfire Beach in Western Australia

Outside of sunset, beaches can be very bright environments, so you may need to adjust your exposure to compensate. Most cameras and phones let you shift exposure left or right manually with a button that looks like +/-, or from inside the app.
If you are shooting friends and can’t find shade, consider setting your camera’s flash to “fill” setting to compensate. This uses the flash to light up the shadows caused by the sun, and can make portraits shot into the sun look more pleasing.
Finally, take care of your gear. Fine sand and salt water don’t agree with most camera equipment! Here are some more beach photography tips to get you started.

9. Master Taking Pictures of Landscapes

There are two things that helped my landscape photography improve: a tripod and a polarizing filter (if you’re interested in my photography equipment, here’s a full list of my travel photography gear).

Controlling depth of field is a key part of landscape photography. Unfortunately, as you increase the aperture the shutter speed becomes slower — to the point where your hand movement can result in a blurry image. This is why you need a tripod.

Read more about how shutter speed, ISO (light sensitivity setting), and aperture are linked in this article on the exposure triangle.

A polarizing filter is fantastic for making blue skies and clouds pop, and for controlling reflections. It also reduces the amount of light entering the camera, so that tripod is even more helpful.

If the above two sound like too much effort, don’t worry. You can improve your landscape photography no end by thinking seriously about your composition. Leading lines, the rule of thirds, and finding a sense of scale by putting subjects in your foreground or mid-ground are key.

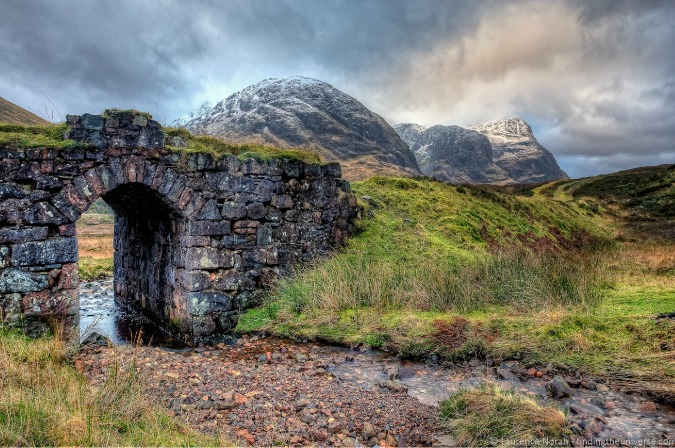
Captivating photograph of a stone wall door and mountain range in rainy Europe

10. Learn How to Use Low light

So often we’re out with friends at night and want to capture those moments together, but we can’t seem to get anything other than a blurry mess.

This is because most cameras aren’t great when working with the amount of light that’s available at night —they use slow shutter speeds that turn movement into blurs.

More expensive equipment can make a real difference for low-light photography. All is not lost if your pockets aren’t deep enough, though. First, you can increase the ISO setting on your camera. While this will reduce the quality of your shots, they will look better than blurry photos.

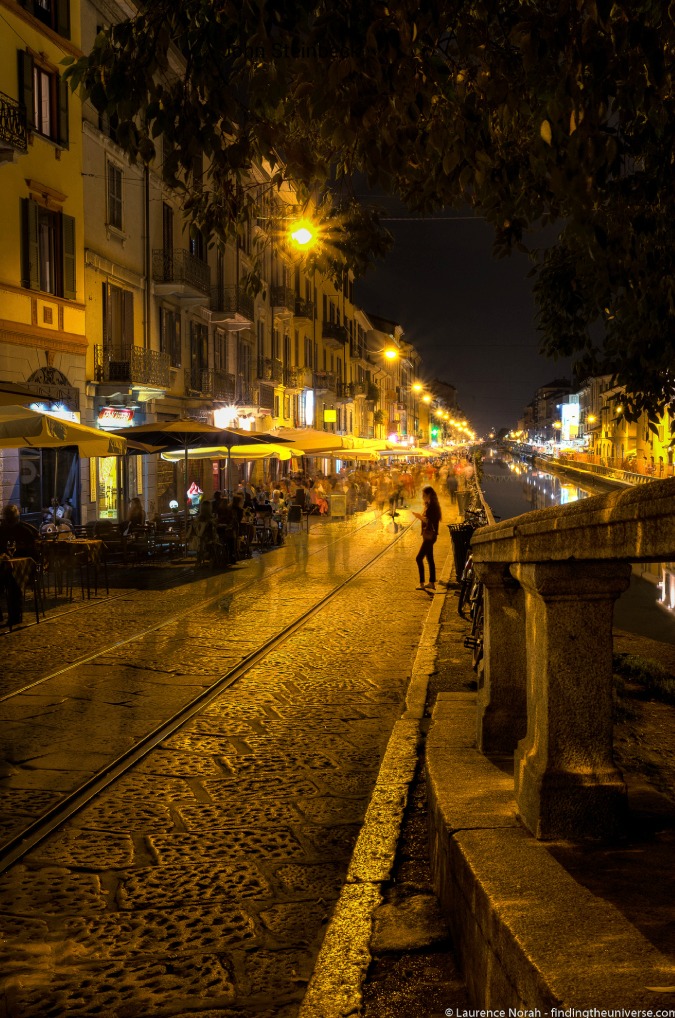
Another idea is to find something to rest your camera on. If you don’t have a tripod, try and find an alternative — anything that is stationary and not prone to shake like your hand does. Then, use your camera’s timer function to take the shot. If you’re taking pictures of people, get them to stand as still as possible!

Romantic photo of a nighttime street and canal in Europe

11. Get Action Shots

For better action photos, you have two options. One is to use a fast shutter speed to “freeze” the action — such as a shot of a hummingbird in flight, or a surfer on a wave.

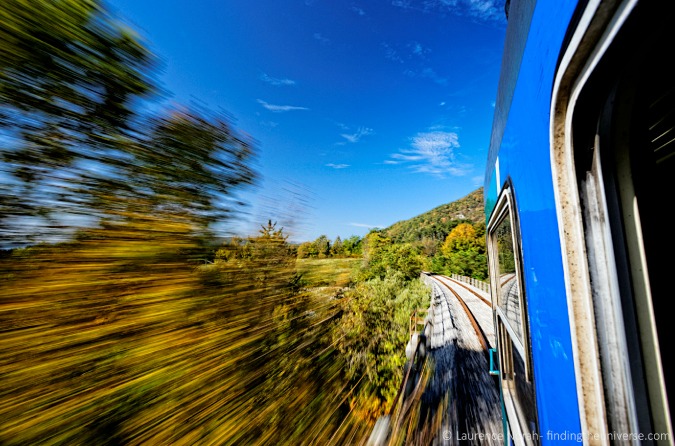
The other option is to show the motion by using a longer shutter speed — the resulting blur will convey a sense of action to your viewer.

In this shot of a train, I manually set the shutter speed to 1/30th of a second, slow enough that the trees at the edge of the shot would seem to be rushing past as I leaned out of the window, yet fast enough that the train itself would remain sharp, even handheld. I think this worked pretty well!

Photo from a fast train passing by a lush landscape

12. Take Pictures of Waterfalls

Waterfalls are a fantastic photography subject. My favorite way to shoot them is with a slow shutter speed, creating a soft and fluffy effect. Shutter speeds of 1/15th of a second and slower give the best results — you’ll need to use a tripod or rest your camera on something to avoid blur from your hand movement.

Another good way to shoot waterfalls is from far away using a long lens, using compression to create a sense of drama around your subject. Or, go the other way, and shoot super-wide, taking in the full glory of the scene.

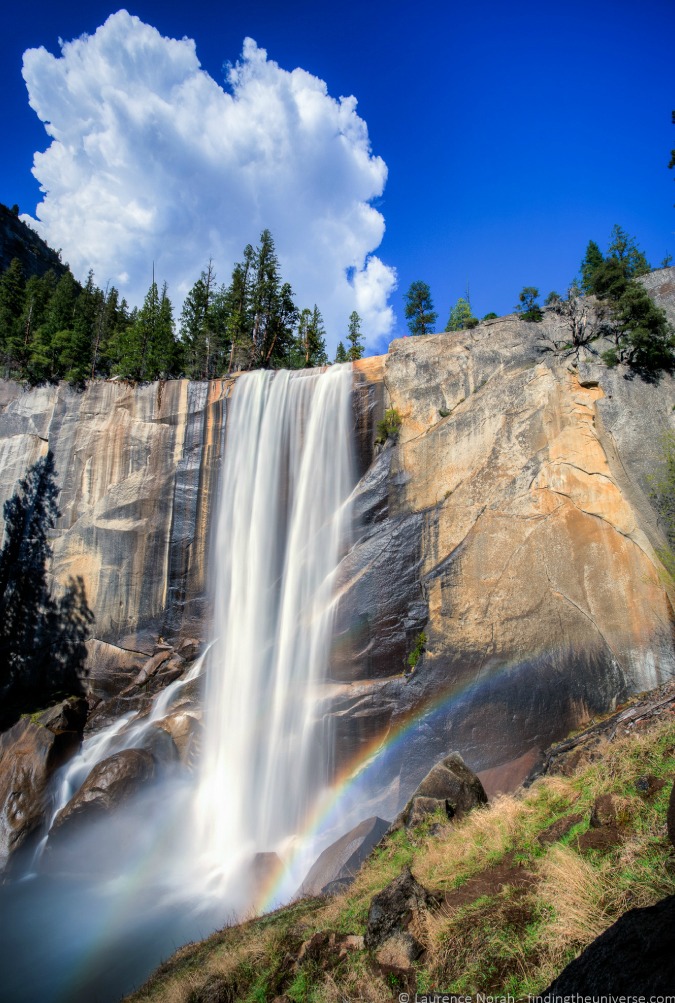
Finally, don’t forget to use the light. All that flowing water can cause beautiful rainbows, as seen in this shot of Vernal Falls in Yosemite:

Breathtaking photo of the Vernal Falls and a rainbow in Yosemite Nation Park, USA

***
I believe that taking better photos is a combination of three factors — being in the right place at the right time, knowing how your gear works, and knowing how to compose a great shot. Shutter speed and aperture are two key settings in the photographer’s toolbox, and you need to learn how to access and control those modes on your camera.

When you do, you will have much greater creative control over your photography.

Laurence started his journey in June 2009 after quitting the corporate life and looking for a change of scenery. His blog, Finding the Universe, catalogs his experiences and is a wonderful resource for photography advice! You can also find him on FacebookInstagram, and Twitter.

Travel Photography: Learn More Tips

For more helpful travel photography tips, be sure to check out the rest of Laurence’s travel photography series:

LEARN TO GET OUT OF AUTO!

capture the world photography courseIf you are looking to really get into photography and want to master your camera and take amazing photos when you travel, Laurence and I have developed a comprehensive photography course that will get you out of auto and have your friends go “Wow! That’s really breathtaking!” in no time. Click here to learn more about it!

Book Your Trip: Logistical Tips and Tricks

Book Your Flight
Find a cheap flight by using Skyscanner or Momondo. They are my two favorite search engines because they search websites and airlines around the globe so you always know no stone is left unturned.

Book Your Accommodation
You can book your hostel with Hostelworld. If you want to stay elsewhere, use Booking.com as they consistently return the cheapest rates for guesthouses and cheap hotels. I use them all the time.

Don’t Forget Travel Insurance
Travel insurance will protect you against illness, injury, theft, and cancellations. It’s comprehensive protection in case anything goes wrong. I never go on a trip without it as I’ve had to use it many times in the past. I’ve been using World Nomads for ten years. My favorite companies that offer the best service and value are:

Looking for the best companies to save money with?
Check out my resource page for the best companies to use when you travel! I list all the ones I use to save money when I travel – and I think will help you too!

The post 12 Ways to Shoot the Perfect Travel Photograph appeared first on Nomadic Matt's Travel Site.